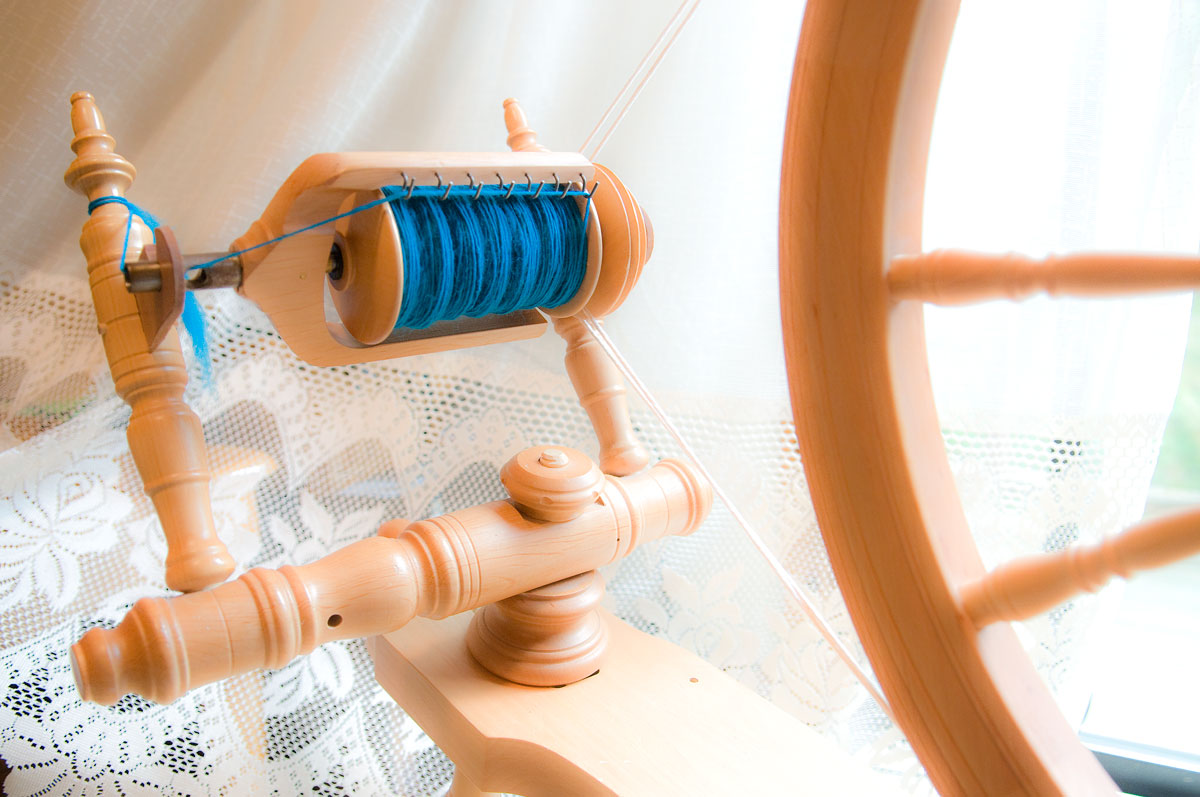
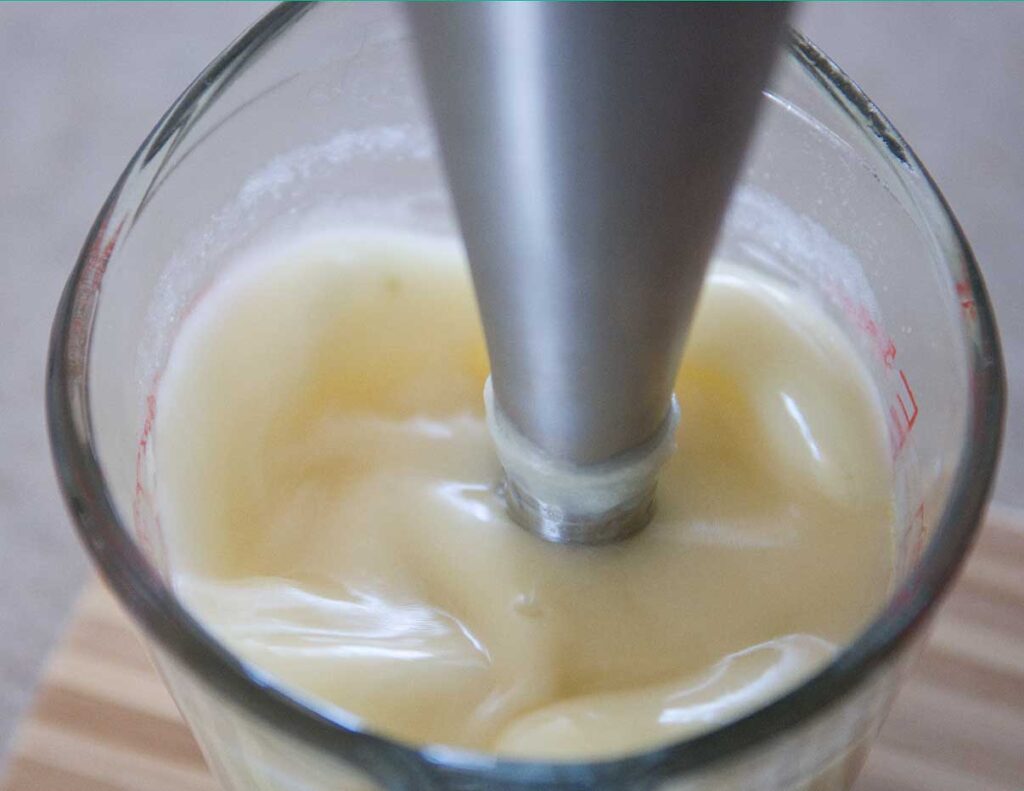
I am using lace cashmere yarn plied with a strand of silk for better strength and stability.
Knitting machine: KnitKing Compuknit IV
Yarn Tension: 3
Stitches per inch: 9.5 (38 stitches in 4″)
Rows per inch: 14 (56 rows in 4″)
Foot Measurements
Before we start, here are the foot measurements we’ll be working with:
Foot length: 9.5”
Distance from ankle bone to big toe joint: 6.5”
Ankle circumference: 8” at the narrowest point
Since socks need to fit snugly, the pattern includes negative ease, meaning the sock is knitted slightly smaller than the foot. Wool’s natural elasticity ensures a comfortable stretch.
Creating a Snug Fit
The cuff is designed to fit securely around the ankle to prevent slipping.
The ankle circumference with negative ease is 7”, ensuring a snug but comfortable fit.
Use yarn tension 3 for the cuff portion of the sock.
Step 1: Knitting the Folded Hem on the Ankle
Cast on 66 stitches with waste yarn using open cast on method.
Knit a few rows.
Remove the waste yarn from the carriage.
Insert the working yarn and knit 60 rows on tension 3.
Fold the hem to create a smooth edge.
Step 2: Shaping the Ankle to Heel Band
The bridge of the foot is the widest part, so we need to increase number of stitches for a comfortable fit.
Reset row count to 0 (RC=0);
Keep tension at 3 and knit 4 rows;
RC=4: increase by 2 stitches, one one each end, and knit 3 rows;
RC=8 increase 2 stitches;
RC=12: increase 2 stitches;
RC-16: increase 2 stitches;
RC-20: increase 2 stitches;
In total, you have knitted 20 rows with 10 increases.
Now we have a total of 76 stitches (38 needles on each side of zero).
Step 3: Removing Needles from Each Side of the Pattern
Reset row counter to 0. Knit 1 row.
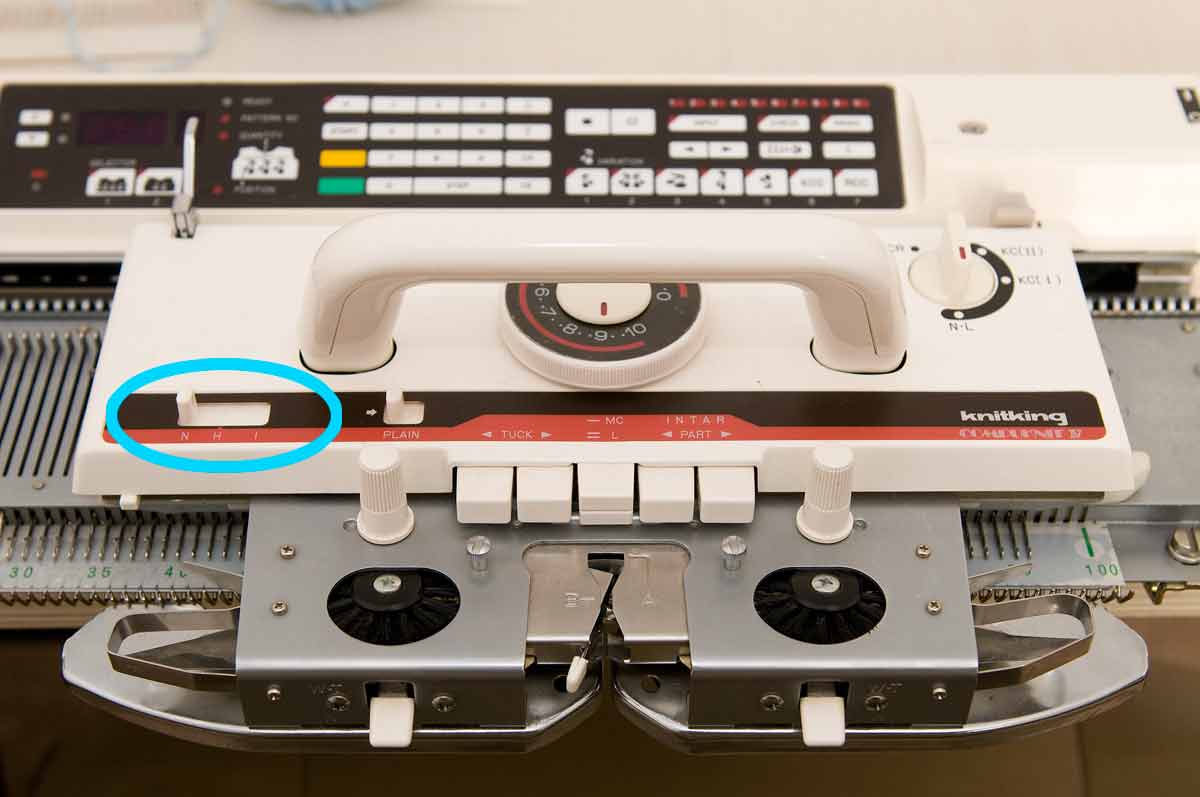
RC=1: With the cartridge on the left, move 19 outermost needles on the right to hold position (E). Switch the holding cam lever to H (hold) position.
The yarn tail is now at the right end of the working needles.
Remove the working yarn from the cartridge. Move all needles left of the 19 needles to holding position (E). Move the 19 needle on the right from position E to working position.
Insert waste yarn into the cartridge. Knit a few rows with the waste yarn.
Cut the waste yarn. Move the cartridge to the left. The 19 stitches on the right should fall off the needles.
Move the 19 needles on the right to the neutral position so that they are not engaged in the knitting.
Move 19 outermost needles on the left to the working position. Charge the cartridge with the waste yarn and knit a few rows ending with the cartridge on the left.
Cut off the waste yarn and remove it from the cartridge.
Move the empty cartridge from left to right. Because the cam lever is in H position, the outermost 19 needles on the left should be free from the knitting. The 38 needles in the center should stay untouched because they are in hold position.
Move the 19 needles on the left to the neutral position.
Thread the cartridge with the working yarn.
Switch the cam lever to N (normal) working position.
Now, we need to knit 80 rows for the dorsal portion of the foot before the toe box. However, I we are going to knit 80-12=68 rows. The remaining 12 rows will be knitted with a stronger toe reinforcement yarn.
Step 4: Knitting the Bridge of the Foot (Dorsal Foot)
Reset your row counter to zero.
All needles are in working position.
You can keep the cam lever in H position. All needles will be knitted because they are in working position.
Increases:
We are starting with 38 stitches (working on the top side)
Knit 2 rows
RC=2: Increase 2 stitches (one on each side) and knit 2 rows;
RC=4: Increase 2 stitches and knit 2 rows;
RC=6: Increase 2 stitches and knit 2 rows;
RC=8: Increase 2 stitches.
RC-10: Increase 2 stitches.
RC-12: Increase 2 stitches.
RC-14: Increase 2 stitches.
Now, we have 52 stitches. Rows remaining: 54.
Decreases:
I need to decrease to 32 needles in ~2″ or 30 rows.
Knit 3 rows
RC=17: Decrease by 2 stitches and knit 4 rows;
RC=20: Decrease by 2 stitches and knit 4 rows;
RC=23: Decrease by 2 stitches and knit 4 rows;
RC=26: Decrease by 2 stitches and knit 4 rows;
RC=29: Decrease by 2 stitches and knit 4 rows;
RC=32: Decrease by 2 stitches and knit 4 rows;
RC=35: Decrease by 2 stitches and knit 4 rows;
RC=38: Decrease by 2 stitches and knit 4 rows;
RC=41: Decrease by 2 stitches and knit 4 rows;
RC=44: Decrease by 2 stitches and knit 4 rows;
Rows remaining: 24; Needles engaged: 32.
Knit the remaining rows to reach row 68.
This section covers the distance from the ankle bone to the toe box with negative ease, ensuring a snug fit.
Step 4: Shaping the Toe Box
The toe box is knitted similarly to the heel:
Switch from working yarn to reinforcement yarn and knit 12 rows.
Move the outermost left-side needle to E position.
Make sure the cam lever is in H position.
Work short rows until 18 stitches are removed (9 on each side).
Begin increasing, moving one needle at a time back to the working position until all needles are in working position: 18 decreases.
Use “Sew as you Go” method for the first 12 rows to finish the toe box with the reinforcement yarn.
Step 5: Knitting the Bottom (Plantar) Part of the Foot
Switch row count to zero. I’ll need to knit 68 rows.
Switch yarns from reinforcement yarn to the main working yarn (cashmere/silk).
Knit 60 rows using “Sew as you Go” technique.
RC=60: Increase by 2 stitches and knit 4 rows;
RC=64: Decrease by 2 stitches and knit 4 rows to reach row 68.
Step 6: Knitting the Heel with Short Rows
To shape the heel:
Reset the row counter to 0 and switch to reinforcement yarn.
RC=0: Knit 12 rows using “sew as you go” technique.
Make sure that the cam lever to H position. Reset row counter to 0.
RC=0: Knit short rows 18 times (reducing by 9 needles on each side).
RC=18: Knit short rows 18 times (increasing by 9 needles on each side).
RC=32: Knit rows with reinforcement yarn using the “sew as you go” method.Attach claw weights to stretch the curled fabric. Otherwise, the stitches can easily fall off the needles.You don’t need to wrap the yarn around the needle this time.
The heel should now have a natural curve.
Switch to the waste yarn and knit a few rows to finish the sock.
Step 6: Stitching the Sock
Now it’s time to seam the sock together:
Use Kitchener stitch for the heel for an invisible finish.
Use mattress stitch to seam up the ankle seam in the back, including the folded hem.
Since the socks are knitted flat on a machine, they need to be stitched together. To create a mirror image for each foot:
Ensure the seam runs along the inside of the foot for a polished look.
Adjust your starting position so the left and right socks are symmetrical.
When knitting short rows, work the increases and decreases on the right side of zero for the left foot and left side of zero for the right foot.
Final Thoughts
Congratulations! You’ve just knitted a beautifully crafted wool sock with a perfect fit. This technique ensures warmth, comfort, and a professional finish. Happy machine knitting!
Introduction: The Benefits of Machine Knitting Socks
Machine knitting offers a fantastic way to create folded-hem socks with speed, precision, and professional-quality results. Unlike hand knitting, a knitting machine allows you to quickly correct mistakes or modify patterns on the fly, saving valuable time. This flexibility also means you can experiment with different yarns and combinations without worrying about long hours of rework. Whether you’re making socks for yourself or as gifts, machine knitting ensures a consistent, snug fit with beautiful, polished finishes in a fraction of the time.
Yarn & Gauge
For this project, we’re using lace wool yarn with the following gauge:
Knitting machine: KnitKing Compuknit IV
Yarn Tension: 7
Stitches per inch: 8
Rows per inch: 11
Foot Measurements
Before we start, here are the foot measurements we’ll be working with:
Foot length: 9.5”
Distance from ankle bone to big toe joint: 6.5”
Ankle circumference: 8” at the narrowest point
Since socks need to fit snugly, the pattern includes negative ease, meaning the sock is knitted slightly smaller than the foot. Wool’s natural elasticity ensures a comfortable stretch.
Creating a Snug Fit
The cuff is designed to fit securely around the ankle to prevent slipping.
The ankle circumference with negative ease is 6.75”, ensuring a snug but comfortable fit.
Use yarn tension 7 for the cuff portion of the sock.
Step 1: Knitting the Folded Hem on the Ankle
Cast on 62 stitches using waste yarn using open cast on method.
Knit about two inches.
Remove the waste yarn from the carriage.
Insert the working yarn and knit 56 rows at tension 7.
Fold the hem to create a smooth edge.
Step 2: Shaping the Ankle to Heel Band
The bridge of the foot is the widest part, so we need to increase number of stitches for a comfortable fit.
Reset row count to 0 (RC=0);
Keep tension at 7and knit 4 rows;
RC=4:increase 2 stitches, one one each end, and knit 4 rows;
RC=8: increase 2 stitches and knit 4 rows;
RC=12: increase 2 stitches and knit 4 rows;
RC-16: increase 2 stitches and knit 4 rows;
In total, you have knitted 20 rows with 8 increases.
Now we have a total of 70 stitches (35 on each side of zero).
Step 3: Knitting the Heel with Short Rows
To shape the heel:
With the carriage on the right, move half of the needles to the left of zero to the E (non-working) position.
Set the cam lever to H position (this ensures only the working needles are knitted).
Decrease stitches as follows:
Move the first needle opposite the carriage to E position.
Wrap the yarn under the first needle to avoid holes.
Continue until 11 stitches remain in the center.
Attach claw weights to stretch the curled fabric. Otherwise, the stitches can easily fall off the needles.
Start increasing stitches, by bringing the innermost needle on the opposite side of the carriage back to the working position one at a time, until all needles are back in place.
You don’t need to wrap the yarn around the needle this time.
The heel should now have a natural curve.
Step 4: Knitting the Bridge of the Foot
Reset your row counter to zero.
All needles are in working position.
You can keep the cam lever in H position. All needles will be knitted because they are in working position.
Knit 8 rows
RC=8: Decrease 2 stitches (one on each side) and knit 8 rows;
RC=16: Decrease 2 stitches and knit 8 rows;
RC=24: Decrease 2 stitches and knit 8 rows;
RC=32: Decrease 2 stitches.
Now, you have 62 stitches (31 on each side).
Continue knitting without decreases until the row counter reaches 44 rows.
This section covers the distance from the ankle bone to the toe box with negative ease, ensuring a snug fit.
Step 5: Shaping the Toe Box
The toe box is knitted similarly to the heel:
Move left-side needles to E position.
Make sure the cam lever is in H position.
Work short rows until 11 stitches remain.
Begin increasing, moving one needle at a time back to the working position.
When all stitches are back in place, knit one half-row to bring the yarn to the center.
Cut the yarn, leaving a long tail (3x the width of the sock) for stitching.
Insert waste yarn and knit a few rows at tension 7 or 8 to secure the work.
Step 6: Stitching the Sock
Now it’s time to seam the sock together:
Use Kitchener stitch for the toe box for an invisible finish.
Use mattress stitch to seam up the length of the sock, including the folded hem.
Right Sock vs. Left Sock
Since the socks are knitted flat on a machine, they need to be stitched together. To create a mirror image for each foot:
Ensure the seam runs along the inside of the foot for a polished look.
Adjust your starting position so the left and right socks are symmetrical.
When knitting short rows, work the increases and decreases on the right side of zero for the left foot and left side of zero for the right foot.
Final Thoughts
Congratulations! You’ve just knitted a beautifully crafted wool sock with a perfect fit. This technique ensures warmth, comfort, and a professional finish. Happy knitting!
A wide, rolled-up bundle of carded fleece that unrolls into a blanket.
Bench
A table of the spinning wheel on which the wheel and spinning mechanism are mounted
Bulk
Wool’s filling power or “bounce” is the volume occupied by wool fibers. It can be applied to loose wools, slivers, or yarn and is expressed as cm3/g measured in a bulk-o-meter (bulk meter). Loose wools can range from 20 to 35 cm3/g with the values for sliver and yarn being progressively lower.
Butt-end
The end that was cut in shearing the sheep.
Carding
From Latin Carduus, meaning thistle or teasel. It is a process of disentangling and aligning fleece fibers. A hand carder or a drum carder is used.
Draft
Pulling out of fibers to allow only a certain amount of the fiber to twist into thread
Drafting triangle
Fanned-out fibers forming a triangle between an active hand and a passive hand in spinning.
Draw
A technique of pulling out fibers in the spinning process. The technique includes long draw and short draw.
Drive band
A cord carrying the power from the large wheel to the spindle or bobbin/pulley
Drop spindle
A stick with a weighted whorl that is used to twist fibers into thread (aka hand spindle).
Drum carder
A drum-like tool that cards fibers for spinning.
Fleece
Raw wool shorn from a wool animal, such as goat, sheep, vicuna, etc. before being processed into yarn.
Grease wool
Unwashed wool as it comes off of a sheep.
Grist
Yarn property that describes the relationship between yarn’s weight and its length. Grist is expressed in units of length per unit of weight. (Eg. 10 yards per ounce or 160 yards per pound.)
Hand carder
A tool used to hand-card fleece (a process similar to brushing). It is typically a large paddle set with 1/4 inch (0.6 cm) curved metal tines.
Hank
A coil or skein of yarn. A measurement of the length per unit mass of cloth or yarn, which varies according to the type being measured. A hank of worsted wool is 560 yards long (560 yd/lb = 1.129 km/kg).
Hogget
A yearling sheep (Brit.). A lamb between weaning and first shearing (NZ).
Kemp
Kemp is generally a chalky-white, brittle, weak fiber that may be mixed with normal fibers in a sheep’s wool fleece. Kemp fibers are often detached from the skin. This hair is not desirable in a fleece, as it does not accept dye, minimizing both the quality and the value of the wool.
Knot
A 40-yard strand skein of yarn wound on a reel or a niddy-noddy that measures 2 yards in circumference = 80 yards.
Leader
A piece of yarn afixed to the shaft of a bobbin to start spinning new yarn.
Niddy-noddy
A universal folk name describing a double-headed tool used to skein spun yarn. The implement was called a hand reel in Colonial days.
Noil
Large clumps of tangled wool and knots combed out of wool fiber before spinning.
Quill
A weaver’s spindle.
Rolag
A roll of fiber generally used to spin woolen yarn. A rolag is created by first carding the fiber and then gently rolling the fiber off the cards. If properly prepared, a rolag will be uniform in width, distributing the fibers evenly.
Roving
Fiber is carded or combed into a long continuous cord that is 2″-3″ thick. The fibers are going in multiple directions (but generally more aligned than a rolag or batt). This preparation of fiber is best suited to woolen spinning.
S-twist
Yarn spun with a counterclockwise twist. It looks like the letter “S”.
Scour
A synonym for washing used in the textile industry, especially in the sense of getting something thoroughly clean.
Skein
A length of yarn or thread that has been loosely coiled and knotted.
Skeining
Winding the thread off the spindle.
Skirting
The process of removing junk wool, stains, second cuts, and vegetable matter (VM) from the wool fleece prior to processing or offering for sale.
Sliver
Long strips of fiber created by carding or combing and drawing into long strips. Sliver is a thinner version of roving.
Slubs
Thick and thin areas in spun yarn.
Spinning count
A measure of wool diameter developed in England. It is defined as the number of hanks of yarn that can be spun from a pound of a clean wool top.
Staple
Length of a lock of fleece or a single fiber.
Strick
A bundle of flax prepared for spinning after the tow has been removed (long fibers only).
Suint
(Pronounced Soo-INT). Concentrated sheep sweat. It consists largely of potassium-based salts of fatty acids, combined with sulfate, phosphate, and nitrogen compounds. The “grease” part is a form of wax. In the trade, this stuff is referred to as wool fat. As extracted from the scouring process, it is called degras, and in a refined form comes to market as lanolin.
Top
Fiber is combed to provide spinning fiber in which all the fibers are parallel. This preparation of fiber is best suited to worsted or semi-worsted spinning.
Tow
Short fibers, which are left after the flax is combed out.
Woolen
A yarn spun from a rolag using a long draw technique. Woolen yarn is soft, light, stretchy, and full of air as opposed to worsted yarn which is strong, dense, and sleek.
Worsted
1. A technique that involves spinning long parallel fibers all aligned in the same direction from the butt-end to the tip. A short draw is used to spin worsted wool. The contrasting technique is woolen. 2. A particular weight of yarn that produces a gauge of 16-20 stitches per 4 inches of stockinette, and is best knitted with 4.5mm to 5.5mm needles (US size 7-9).
Wuzzing
Spinning out the water when washing, scouring, and rinsing fleece or yarn. It operates on the same principle as the spin cycle on a washing machine.
Z-twist
The yarn spun with a clockwise twist. It looks like the letter “Z”.
This project was my first complete project back in the early days that I did almost from scratch. It included the spinning all by myself (the very first yarn I spun since my training at The Woolery a few months prior) and knitting with my homespun yarn. This was my first real spinning project – not my first knitting project, though. As a kid, I learned to knit from my grandmother and from my neighbor. I leaned how to crochet from my mom. I was seven when I started and I haven’t stopped ever since.
As a knitter, I always wanted to have a full control of the type of yarn I am using for my projects. Naturally, it’s very difficult to find the exact composition of natural fibers in my yarn, yarn thickness, type of yarn, color, price, and many other factors that affect the final article I am making. Having said that, spinning my own yarn had always been my secret dream.
That year, my dream came to fruition. The way it started, was quite shocking for us. It all started with our shed fire on the New Year’s night in January 2018. A lot of expensive farm equipment, animal feed, tools, etc. were lost in that fire. It was a devastating experience for my family. With time, we had to move on and continue living as normally as possible. We cleared our yard from the fire remnants and recovered from the effects of that horrible disaster. As a part of the recovery, we decided to make a purchase for each of us – something that would make us happy. I chose to buy a spinning wheel.
Elizabeth 2 by Ashford arrived at my door in January 2018. Although elegant and beautiful construction, the wheel look extremely intimidating to me. I had no idea how to start learning. I searched for YouTube videos and spinning classes in my area. To my great surprise, the famous Woolery is within a mere forty-minute drive from my house! We lived in the country, and the closest grocery store was farther away than The Woolery. I took the beginner class at The Woolery and I am so glad I did! Nancy, the instructor, has a specific teaching method that really helped me master the entire spinning process very quickly.
My choices and possibilities have multiplied infinitely with the new skill of preparing fleece and spinning wool into yarn. Since I learned how to spin, I made a commitment to spin almost every day and definitely every week. Subsequently, I have spun many hundreds of yards of fiber (may be even miles, I am not sure). And I made many articles of clothing with my hand spun yarn.
This little project was my very first piece of work that started from spinning my own yarn and finished as a final article of clothing.
Romney wool is one of the easiest types to spin for beginners. These rovings of white and blue Romney fleece were purchased at the local yarn shop.
The transformation of wool from fleece to the final article had began.
Romney wool rovings.
I ended up using my second spinning wheel, Kromsky Symphony with a double treadle for this project. And I am glad I did. The double treadle gave a good control of the drive wheel and made my first big project very easy to accomplish as a beginner.
I enjoyed my first independent spinning project enormously.
I spun two bobbins of white and blue single (not plied) yarns paying very close attention to the thickness of my fibers. Nevertheless, I made a typical beginner’s mistake – I overspun my yarn.
My yarn is “over-twisted.” This is a typical mistake a novice makes. The forgiving long wool Romney fleece still feels very plush.
This mistake gets corrected to some degree during plying when the yarn unwinds a little. This is because when we ply yarns, the plying direction is opposite to spinning direction. For example, spinning occurs clockwise direction forming a z-twist. While plying happens in counterclockwise direction resulting in an s-twist. You can easily see the s-twist in the pictures below because it has contrasting fibers.
Freshly spun yarn should not be plied the same day. The yarn rests on the bobbins for 24 hours to set the spinning tension.
After the waiting period I made a two-ply yarn.
Below is a picture of my very first plying project. I was happy with the result because the final yarn tension was lessened by the plying. And my overspun strands were compensated.
Two-ply worsted weight Romney wool yarn for the mittens.
After plying, my yarn became much more relaxed. But, it’s not ready for knitting yet.
The next step was to remove the yarn from the bobbin and wind it into a skein in preparation for washing. A wool tool called niddy-noddy is used for that purpose.
Two-ply yarn on a niddy-noddy. You can see the imperfections. It’s thick in some places and thinner in others. This is my first project after all.
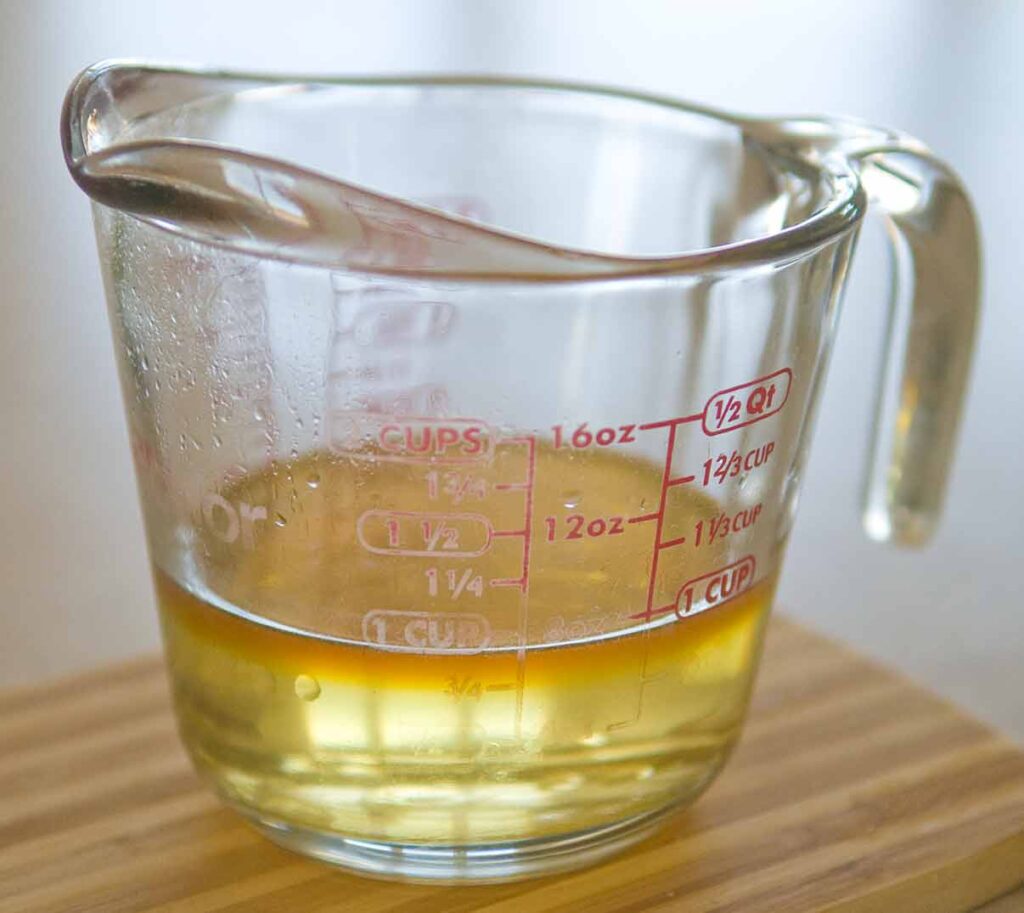
The next step is to wash and dry the yarn. I slipped the skeins off the niddy-noddy and washed them in hot soapy water. Washing of the wool is very different from regular laundry. Wool is placed in hot soapy water to rest there for 15-20 minutes. Wool is then removed and gently squeezed of water. No agitation in the wash and no wringing is allowed. Otherwise, the wool will felt.
After the wash, I rinsed the wool in hot water a few times. I use a small amount of vinegar in the last rinse to remove any residual alkali soap and to condition the wool. I used my drying rack to hang the washed skeins to air dry. Sometimes, I use weights for the drying process. But I didn’t use any weights that time. I let the wool dry naturally. To my surprise, the yarn became very relaxed and not over-twisted at all after washing and air-drying.
My next step was to wind the wool into balls. A couple of wool contraptions are used for this. The swift stretches out like an umbrella to hold the skein around its “waste.” And the yarn ball winder creates nicely wound balls of wool.
I could’ve used my sturdy sewing desk for this purpose. But I actually preferred to use my second floor railings for this job. The umbrella swift opens very widely, and I sure don’t want it to catch on anything or anybody while I wind the yarn.
Using a swift (left) and a ball winder (right) to transform the skeins into balls of yarn.
The amount of fleece rovings in the basket above produced these three balls of tightly spun and rather thick yarn.
Balls of white-and-blue two-ply yarn ready for knitting.
Since this project I spun miles of yarn. Every new project hones the skill. But, I think, this wasn’t too bad for a newbie.
I used long wool for my first spinning project. This type of wool is easy to spin, but the resulting yarn is coarse. Long wool is usually not fine like Angora or Merino. The benefit of long wool is that it’s very durable. In addition I used a worsted spinning method making the yarn even stronger.
The yarn that is so thick can be good to make socks, outer ware, or mittens. I decided to knit a pair of mittens since longevity is important. The tight twist of the thread adds to the durability even more.
I hand-knitted this pair of mittens while having a social breakfast with my family on a weekend. I could definitely see the uneven areas of yarn and I knew where I needed to improve.
The palm side of the mittens.The back of the mittens.
My first project gave me an amazing sense of satisfaction seeing the shapeless and fluffy wool transforming into an article of clothing.
How I made my Wool Lace Tunic from Start to Finish
Making things from scratch is so rewarding! So, when I crafted my lace tunic a few years ago, I intended experience every aspect of garment making. It wasn’t truly a farm-to-fashion journey quite yet because I didn’t really see the sheep that produced the wool. In fact, the roving I purchased was an import from England.
But, I was excited to embark on my new wool craft endeavor. To give you a sneak peak of my lace tunic project, I made the picture montage below.
Hickory lace tunic montage
Starting my Lace Tunic Project
My project began with a trip to the local yarn store for a quick purchase of some fleece for the spinners guild meeting. I bought a pound of off-white roving consisting of wool from 57 different sheep. With that roving and my travel spinning wheel, I rushed to my guild meeting.
Wool roving for my lace tunic.
Gosh, I can’t tell you how much I enjoyed my spinner’s guild back in Kentucky! I made so many friends and learned a lot. Ah, I really miss my Kentucky guild!
I arrived to the meeting and set up my Lendrum portable spinning wheel. All yarn spinners bring their wheels and arrange them in a large circle. That way, we can all see what other crafters are working on, share tips and ideas, joke and socialize while having refreshments. I hope, you guys are back to your gatherings after the pandemic.
Spinning the Wool into Yarn
So, having everything setup, I decided to spin very fine yarn for my lightweight gossamer pullover for that exceptionally warm winter month.
Wool roving and the lace-weight yarn.
After the meeting, I finished the rest of my project at home in a few days. It was surprising to me to learn how long it took to spin just one bobbin when the yarn is so fine!
When spinning yarn, the general recommendation is to keep it on the bobbin for 24 hours to let it rest and set in the twist. I as a diligent spinning student, I followed this recommendation and waited impatiently until the next day. My spinning instructor would be so proud!
The next step after spinning is plying. To ply the yarn, you need to spin two or more fibers in the opposite direction. This way, the yarns literally wind on each other. The opposite spin allows to slightly loosen the torque by unwinding the yarn. I made a two-ply yarn to make sure it is still very fine for my gossamer tunic.
The Niddy Knoddy Winding and Singing
Following my usual routine, I transferred the spun and two-plied yarn from the bobbins into skeins using a hand reel with a bucolic name “niddy noddy”. (Some people call it knitty knotty, but it’s actually niddy-noddy). Back in old days, women and children used to sing the niddy noddy song while winding their yarns into hanks.
Here is my hand-spun yarn on a niddy noddy.
The Yarn Makeover
The next steps in yarn preparation for knitting are dyeing and washing. Since my yarn was almost white, I could used any color I desired. As with all other fibers I produce, I use only pigments derived from nature. This time, I found the natural dyes right here in my back yard.
The carpet of fallen autumn leaves transformed the forested countryside into a cinnamon-colored landscape. The bright patches of terrain found under the hickory trees are especially attractive.
We collected a few pounds of dry hickory leaves for me to dye my yarn. Dying with natural pigments has an element of surprise as one never knows what exact color, tone, or shade to expect. I could hardly wait to see the final color. To my great surprise, the result exceeded my expectations. I was very happy with this rich golden-brown hue.
Hanks of wool yarn dyed with autumn hickory leaves.
I am finally ready to wind my washed and dyed yarn for knitting. Whew!
My Lace Tunic will be One Big Swatch of Elaborate Patterns
I have a large collection of intricate and intriguing lace knitting patterns. The patterns by themselves are very elaborate and pretty. I decided to go even further and combine some patterns into a three-dimensional garment. My elaborate lacy needlework required a little bit of calculations, but it wasn’t too bad at all.
My lace tunic project was kind of an experiment combining gossamer patterns. Two things I knew for sure. first of all, I wanted a round yoke and three-quarter sleeves. Everything else was pretty much a free form.
After making a small stockinette swatch to measure the knit gauge and a little counting, I made my “Hickory Gossamer Tunic”. Because of not knowing the final result and going with the flow so to speak, the making process became very gratifying to me.
Quite often when knitters finish their work, they stop there. However, there is one more step to do to make your garment looking neat and professional. This step is called blocking. The blocking can be done in many different ways. Perhaps, I’ll write an entire post just on that. So, let’s see how I blocked my lace garment this time.
Blocking my Handmade Lace Tunic
Before the Block
As you can see from two pictures below, the lacy pattern makes the newly created knit fabric look very corrugated.
Lace yoke has a lot of texture.
The pattern that I selected for the bodice has even more relief. In fact, the shape looked to me like an egg carton while in the making.
Lace pattern is corrugated in its original form. It needs blocking.
Obviously, some knitted projects have a purpose of being scrunched like this. It all depends. But I wanted my tunic to be more flat. For this project, I decided to wet-block followed by a steam-block.
Soaking the Garment in Water
For wet blocking, I completely immersed the tunic in water. When it was fully saturated, I pulled it out and squeezed most of the water very gently and trying to avoid any wringing. Then, I laid the tunic onto a thick towel and rolled it in like a burrito. An additional squeezing of the towel burrito moved a large portion of the water from the garment into the towel.
Spreading and Pinning the Tunic on the Blocking Table
After this process, the tunic stayed pretty wet, but not dripping. I placed my tunic onto a special blocking table. The markings on the table surface help spread out the garment as symmetrically before setting it in a permanent shape.
Blocking lace tunic.
The tunic in the picture isn’t just lying on the table. I use special pins and wires to shape the neckline, the sleeves, the sides, and the “teeth” of the hem. This is quite an elaborate process, but it’s done only once. You don’t need to pin and block your knit wool garment after each wash.
Steaming and Ironing the Wet Tunic to Set the Texture
The final step in blocking is to fix this shape to make it permanent. I used the iron that I floated at about half-an-inch from the pullover. This this distance from the iron plate provides enough heat to set the fibers in the pattern without pressing them leaving some texture, but making the garment more manageable during wear.
When the tunic eventually dried on the blocking table, I still wanted it a little more flat. This time, I simply steamed it with the steam iron without touching it. You can touch your garment with hot iron. But this will block it into a very flat garment permanently. This type of blocking is called “killing”. Killing can give you very nice result if desired.
The Result
My lace tunic turned out to be very nice, lightweight, and comfortable. I like the shape, pattern, color, and overall design.
The boundless variety of textiles can turn any clothes shopping experience from pleasant to mind-boggling. How do you know what’s better satin or silk? Are linens really made of linen? What’s the difference between chiffon and crepe-de-chine? Knowing all this is vitally important to be happy with our clothes. After all, we are in contact fabrics with all our senses on a daily basis. Knowing your fabrics is practically impossible without understanding some basic concepts of textiles, such as fabric content and construction. This post is about three main types of woven fabric.
Why is it Important to Know the Types of Woven Fabric?
Although this article gets a little technical, it is not necessarily for textile professionals. Of course, textile professionals are more than welcome to read it. To rephrase it, this post is for everyone who wears clothes during the day, uses sheets for bedding at night, and cares about comfort. In other words, this post is for everyone.
Why do you need to know the basic types of weave?
Have you ever wondered what is the difference between satin and silk fabric?
Does it bother you when the clothes you are wearing are itchy, clingy, staticky, and overall uncomfortable?
Have you ever come from work and the first thing you want to do is to strip off all your clothes and change into a comfy set of peejays, sweats, or shorts?
When you shop for clothes, do you want to know how the garment will look and feel when you wear it?
Do you sleep better at night when your sheets are comfortable?
If you answered “yes” to any of these questions, this article is for you.
Our human body is in contact with fabrics all day and all night. And it is clearly important to know what you are wearing and what kind of bedding you sleep on.
Have you Ever Made a Shopping Mistake? I have.
No one is immune from making a shopping mistake. I am not an exception. Once, I was shopping for silk sheets. I really like silk bedding. I ordered a set of what I was led to believe were “silk sheets” from a reputable source. So I made my bed with the new sheets and lay down hoping for the divine luxury of silk. But instead, a sensation of a plastic garbage bag enveloped my entire body. The static build-up by this material was so intense, that it felt like a million tiny bugs crawling all over my body. The sheets made me very hot and uncomfortable. I could not last more than five minutes in bed which felt like a warm puddle of crude oil. So, that was the end of that purchase.
As I mentioned, I was shopping with a reputable seller. In addition, I was a satisfied returning customer in long standing with that particular business. How did I fall for such misinformation? Even popular and established sellers can hide misleading information in the product description intentionally or not.
Furthermore, the task of deciphering confusing and ambiguous product descriptions becomes even more difficult when sifting through confusing textile-related terminology. The goal I set in this post is to shed some lite on the very basic concepts of the fabric types and descriptions.
The first step in the venture to the exciting world of fabrics starts with learning some basic key concepts. When you know these simple facts, you won’t ask, “What’s the difference between satin and silk?” or “What’s the difference between wool and twill?” Reading and understanding product descriptions will become much easier. And you will be more keen on finding faulty claims and avoiding shopping mistakes.
Fundamental Fabric Concepts on the Palm of Your Hand
First and foremost, all fabrics have two essential components: content and construction.
Content means the material used to make fabrics. These materials include natural and synthetic fibers. We all know natural fibers such as cotton, wool, linen, and silk. On the other hand, synthetic fibers include polyester, acrylic, spandex, etc.
In addition, content often includes different blends. For example, common blends include cotton and polyester. Activewear often has spandex for elasticity. Synthetic materials contribute to bright colors, durability, better drape, and elasticity, but they are very uncomfortable on the skin.
You can find the classification of natural and synthetic fibers in this post.
Construction or fabric structure, on the other hand, determines how textile manufacturers assemble the fibers to produce a flat piece of fabric. We know the three types of fabric construction. They include wovenfabrics, knit fabrics, and nonwoven fabrics.
For example, satin is the weave structure, but silk is the fiber that constitutes the fabric component. Hence, we should never compare satin with silk. They are two different things. You can have a silk satin shirt, cotton satin sheets, or a wool satin jacket. Combinations of various yarns or blends are very common. They are, however, different from fabric construction.
Not surprisingly, the most common source of confusion stems from erroneous comparisons of fabric structure with fabric content.
Construction (fabric structure)
Woven
Knit
Non-woven
Plain Twill Satin
Warp Knit Weft Knit (described in a separate post
Felt Suede Leather
Component (fibers)
Natural
Synthetic
Find the classification of textile fibers in this separate post.
This post is about the types of woven fabric only. I will describe knits and non-woven fabrics in separate posts.
Three Basic Weave Structures
All woven fabrics are classified into three main types: plain, twill, and satin.
Plain Weave
What is Plain Weave?
Plain weave also known as tabby weave is the simplest weave construction where one or more weft yarns alternate over and under the same number of warp yarns. In plain weave, the warp and weft yarns interlace with each other at right angles forming a square pattern. It is the most common and basic type of weave.
Pros and Cons of Plain Weave
Plain weave creates fabric with the highest durability in comparison with twill and satin weave. Needless to say, when we compare woven structures we assume that the same or similar fibers constitute the fabrics. We should not compare plainly woven gauze cotton with satin made with Kevlar fibers.
In addition to high durability, plain weave allows to achieve the highest density. It is the most efficient fabric structure in textile production. Plain or tabby woven fabrics do not unravel easily. They don’t stretch well along their grainlines. Plain-weave fabrics have their pros and cons. They wrinkle more easily, don’t have a good drape, and lack the good wicking qualities of the other two types of woven fabric.
Characteristics of Plain-Weave Fabrics
Plain weave is the most common and simple type of weave.
Plain weave brings about a great variety of fabrics. Examples include calico cotton, quilting fabric, poplin, broadcloth, batiste, cheesecloth, gauze, cretonne, gingham, percale, muslin, voile, and taffeta.
Plain weave affords the most efficient usage of yarn. It is inexpensive to produce because of its simplicity.
Plain weave is easy to produce. It is inexpensive offering maximum yardage and density at a lower cost. The yarn count determines the fabric’s durability.
Plain weave has the highest durability in comparison with the other types of woven fabric made with the same fibers.
Plain-woven fabrics are resistant to tear and wear. They don’t unravel easily.
The weave structure is flat and tight.
The appearance of a plain weave is flat and without any distinct design unless the warp and weft yarns are different in composition, color, thickness, twist, or texture. Plain-woven fabrics without print or special surface finish have no right or wrong sides.
Plain weave is amenable for printing.
Plain-weave fabrics are easy to handle in sewing. They also keep their shape very well in garments.
Plain-weave fabrics do not have a good drape. They work well for adding volume to skirts.
Plain-weave fabrics have low elasticity. They hide imperfections very well.
They wrinkle easily.
Textile manufacturers use all fiber types in plain-woven fabrics including silk, wool, cotton, linen, and synthetics.
Variations of Plain Weave
The two variants of plain or tabby weave include balanced weave and rib weave (or unbalanced weave).
Balanced Weave
Balanced weave is a type of plain weave that has equal spacing between warp and weft fibers. These fibers are identical or similar in thickness, twist, and physical properties. Balanced weave produces perfect squares of interlacing fibers.
The thread count of balanced weave is the same along the warp and weft yarns. In other words, the number of warp threads per inch, called ends per inch (EPI) or sett, is the same as the number of weft threads per inch, called picks per inch (PPI).
A variation of balanced weave is a basket weave (aka basketweave or hopsak weave).
In basket weave two or more weft yarns float over and under the same number of identical warp yarns creating a balanced basket-like structure. A basket weave creates a checkerboard pattern. Contrasting colors in warp and weft yarns can further accentuate this checkerboard esthetic.
When the number of simultaneous warp and weft threads increases, the fabric becomes less durable because the gaps between the yarns become larger. This also creates more rubbing and faster wearing of threads. Basket weave, however, is still very durable.
Because of the larger gaps, the basket weave is quite breathable and absorbent. But it shows dirt more easily because it has an open structure.
Typical basket weave fabrics are taffeta and dimity.
Unlike balanced weave, the unbalanced plain weave has a ribbed texture. That’s why we also call it a rib weave.
Rib Weave
In rib weave, the warp and weft yarns have various thicknesses and numbers. This variation of the plain weave creates a corded texture.
Poplin is an example of a rib weave where heavier weft yarn intertwines with a greater number of finer warp yarns.
This type of weave has a distinct rib-like structure. These yarns can substitute each other in a warp or weft direction.
Rib weave offers a very good drape. Its prominent ribs affect the durability of the fabric. Tension may cause yarn slippage.
Typical Fabrics Made with Plain Weave
Bengaline is a fabric with a fine crosswise plain rib weave using rayon, nylon, polyester, cotton, or wool often in combination. Originally, Bengaline was a type of faille dress fabric that replaced silk with cotton as its main fiber.
Chiffon is a very light, sheer fabric made with crepe yarns.
Dimity is a lightweight cotton fabric in a 2:2 basket weave.
Dupioni (also referred to as douppioni, doupioni, or dupion) is a plain-weave silk fabric with a shiny surface and a crisp handle. Dupioni has fine yarn in the warp and slub yarn reeled from two or more entangled cocoons in the weft (filling). It is thicker and more coarse than shantung.
Faille is a dense fabric with prominent weft ribs. Originally, Flemish women used silk faille for their head coverings. Modern faille manufacturers use other natural and synthetic fibers.
Grosgrain is a heavy fabric with a distinct rib weave. Silk or rayon are the typical fibers in grosgrain. But you can easily encounter synthetic grosgrain material.
Habotai is a lightweight and soft fabric. Silk Habotai was a traditional material for kimonos.
Organza is a thin, plain weave, sheer fabric with very low density.
Poplin is a thin and densely woven fabric with a smooth and lustrous surface. Originally, cotton poplin was the common fabric in formal wear.
Rep (also known as rip, repp, or reps) is a rib-woven fabric with fine cords in the filling (weft). Traditionally, the constituent fibers of rep are silk, wool, or cotton. Nowadays, however, rep is commonly a synthetic material.
Shantung is a type of plain-weave tussore silk fabric with ribbed irregular texture. Shantung may have slubs. It is similar to dupioni, but is slightly thinner and less irregular.
Taffeta is a lightweight fabric made with yarn that is twisted while it is woven.
Twill Weave
The other two basic types of weave, twill and satin use floats.
A float is a segment of warp or weft yarn that extends over two or more counterpart yarns without interlacing them.
Perhaps, the most versatile and popular type of weave in home and clothing textiles is twill. Because of their durability, drapeability, resilience, resistance to stains, and visual appeal, twill fabrics have a considerable number of uses from interior and auto upholstery to bags, coats, jeans, chinos, shirts, bedding, lining for garments, and more.
What is Twill Fabric?
Twill Weave Structure
Twill weave is created by two or more warp or weft floats repeated with an offset in a diagonal fashion.
Let’s see how it’s done.
In the first row, a weft thread floats over one or more warp threads and then under one or more warp threads. In the second row, the pattern repeats, but with an offset also known as step. This pattern repeats with such a step (offset) in each progressive row creating a diagonal pattern of parallel ribs also called ridges or wales.
Classifying Twill
We use fractions to classify twill fabric. These fractions describe how the yarns intertwine. For example, a 4/1 twill means that the weft yarn floats over three warp yarns and under one warp yarn as shown in the diagram. The total of four warp yarns in a pattern requires four harnesses (shafts) on the loom.
Characteristics of Twill Fabric
Twill Appearance
Twill Textures
When you look at the twill up close, you notice a pattern of parallel diagonal ribs. This diagonal texture can run in the right or left direction depending on the arrangement of steps. The diagonal directions can change on the loom to achieve variations of twill weave. The most common varieties of twill designs are tartan, herringbone, chevron, houndstooth, and corkscrew. Because of the high thread count twill weave is typically thick and opaque. Twill appearance ranges from muted to shiny.
Colors and Patterns of Twill
Twill fabrics usually don’t have printed patterns. Instead, different colors of warp and weft yarns create a great variety of geometric designs.
Denim is a good example of twill interlacing indigo and white yarns giving it the characteristic speckled look. In addition, denim is a very strong and durable fabric. Blue denim, for instance, has a white warp and indigo weft forming diagonal blue wales on white background.
Twill garments made of wool in tweed or plaid patterns became signature styles in Scottish and Irish fashion.
Physical Properties of Twill Fabric
Twill weave creates greater drapeability and resilience than plain weave with a considerable variety of designs. Drapeability is the ability of a fabric to float smoothly as it hangs. Fabrics with a low drape are crisp and rigid. But high-drape fabrics are smooth, supple, and fluid in appearance and feel. Resilience is the ability of a fabric to return to its original shape after stretching.
Twill has a high thread count making it strong, thick, and hardwearing. It is long-lasting and resistant to tears.
Twill weave gives fabrics an excellent drape and resilience.
This combination of high durability and drape gives twill popularity for upholstery, work and recreational clothing, bath towels, and bed linens.
Twill weave creates a ribbed diagonal pattern whose combinations yield a wide variety of textured geometric designs.
Twill is thick and opaque. It is suitable for formal men’s clothing, drapes, and outerwear.
Twill is resistant to stains because of the fabric’s thickness and textured pattern.
Twill weave is wrinkle-resistant.
Uses of Twill-Weave Fabrics
The beneficial properties and distinct appearance of twill make it a very popular weave.
Work clothes and uniforms. Denim cotton jeans and jackets as well as heavy overalls, coveralls, and painter pants made with drill or denim are the staples of workwear and recreational clothing.
Formal clothing. Twill weave is very popular for tuxedos and formal suits.
Business casual attire. Chino cotton, for example, is common for slacks, Dockers, and other relaxed-fit pants.
Hiking, hunting, recreational apparel, tents, backpacks. Because of their durability, comfort, and low noise on rubbing, twill fabrics are popular for nature sportswear, backpacks, and tents.
Coats and jackets. Tweed, herringbone, chevron, and houndstooth twill designs are common in warm and heavy wool coats, jackets, suits, scarves, etc.
Linens and towels. Soft and absorbent twill pile fabrics are perfect for towels and bathrobes. Flat twill, on the other hand, is a typical weave for bed linens, throws, and shams.
Drapes and upholstery. Because of their thickness, high density, and opacity, twill fabrics are popular for window treatments and soft furnishings.
Typical Twill Fabrics
Traditionally, twill was made with natural fibers such as wool or cotton. But nowadays, twill fabrics are synthetics for the most part. Below is a list of twill fabrics with their original yarn content.
Bedford cord can be plain or twill (drill) weave. Similar to corduroy. (Cotton).
Chino (cotton, linen)
Corduroy (cotton)
Covert (wool)
Denim (cotton)
Drill (unbleached heavy-weight cotton or linen)
Flannel (brushed cotton or wool twill fabric)
Foulard (lightweight fabric, either twill or plain-woven, made of silk or a mix of silk and cotton)
Gabardine (silk, wool, or blends)
Surah (silk)
Serge (2/2 weave with diagonal ribs on the right and wrong sides)
Wool serge is the fabric of military uniforms, suits, trench coats
Silk serge is used as lining fabric
Tweed (wool)
Satin Weave
The last, but not the least of three main types of weave is satin. Fabrics created with satin weave are very soft, smooth, and shiny. These fabrics are very comfortable, elastic, and pliable creating well-fitting and elegant outfits with graceful drape. Satin linens and upholstery are shiny and luxurious. No wonder, satin is the exclusive upholstery fabric in all furniture of Versailles!
What is Satin Weave?
Just like twill, satin fabric is woven on a loom that has multiple harnesses (or shafts). However, a satin loom uses four to twelve harnesses, which is even more than a twill loom.
In satin weave, a weft yarn floats over three or more warp yarns, then under one warp yarn. Alternatively, satin can have three or more warp over weft floats followed by one warp under weft.
The rows woven with an offset of one step give satin an uninterrupted diagonal pattern. This diagonal pattern is almost indiscernible.
The long floats determine the luster and elasticity of satin fabric. The longer the float the shinier and more stretchy the fabric. Satin fabric is reversible. The front is shiny and the back is very dull due to the arrangement of warp and weft yarns.
Variations of Satin Weave
Satin can be classified based on the length of the warp or weft floats described by ratios. The ratios range from 4/1 to 12/1. The first number refers to the number of harnesses (shafts) on a loom and determines the repeating pattern of the weave. For example:
Four-harness satin (4/1 weave). The loom that creates this weave has four harnesses or shafts. In a 4/1 satin weave, the weft yarn floats over three and under one warp yarn. This type of woven fabric gives more elasticity and shine to fabric compared to plain or twill weaves.
Five-harness satin (5/1weave). This weave uses five shafts (harnesses). The thread pattern is made by floating weft yarn over four and under one warp yarn. This list goes all the way to a 12/1 ratio.
Twelve-harness satin (12/1weave). A loom for this pattern has as many as 12 shafts. The weft yarn floats over 11 warp yarns and then under one warp yarn. This satin variant gives the most sheen and elasticity to fabric.
What is the Fiber Content of Satin Fabric?
The long floats of satin require special threads. They have to be durable enough to resist wear and tear. Filament yarn instead of staple yarn is the perfect fiber for satin type of woven textile. Filament yarn is a long continuous fiber. Staple yarn is created by spinning relatively short fibers into a long yarn. Wool and cotton are staple yarns. But the natural filament yarn is silk. Silk fibers are extremely long filaments.
Historically, silk was the only fiber for satin that came about on the brink of the 12th century in China. Maybe this is the reason for the widespread confusion between silk and satin.
The other natural fiber used to make satin is linen. Although, linen is a staple yarn the linen staples are very long rendering it appropriate for a traditional satin weave.
Short staples can unwind in satin floats caused by movement and rubbing of fabric when in use. That is why only long filament yarns are appropriate for satin. Although wool is a staple yarn, fine wool is suitable for satin weave because wool tends to become stronger during wear.
While silk is the most traditional fiber of satin, silk is becoming less and less common. Synthetic filaments such as polyester, nylon, rayon, or modal are more common materials in satin fabric nowadays. When you are shopping for satin garments, sheets, or fabrics, beware of the abundance of petroleum-based synthetics such as polyester, nylon, or spandex.
In our store, however, you will find only natural silk satin.
Characteristics of Satin Weave Fabrics
Satin fabric is extremely lustrous, with remarkable drapeability. It complements the figure beautifully. That’s why satin is very common in feminine attire and nightgowns. Satin is quite delicate. Because of the uninterrupted diagonals, they can snag easily.
Satin fabric is shiny and luxurious. A silk satin garment feels like a luxurious and soft caressing cloud.
Satin is a fine fabric that is smooth and compact in appearance with a bright luster.
Satin has a flat and tight weave structure. Satin is usually made with very fine fibers giving it a high thread count.
The continuous warp diagonals are visible under a magnifying glass.
Satin has remarkable drapeability. It is a very soft and pliable fabric that molds to shapes, accentuates, and complements the figure.
Satin has two sides: a shiny front and a dull reverse side.
Satin is wrinkle-resistant. Similar to twill, satin wrinkles much less than plain-woven fabrics.
Satin is not as durable as the other weaves. The longer the floats, the less durable the fabric is.
If you make garments, curtains, or linens yourself, you know that satin is difficult to work with. It floats on the table and lining up pattern pieces takes time. One solution that I use is to spray your satin fabric with a fine mist of water, it becomes much more manageable. But be careful not to stain the fabric.
Uses of Satin
Because of the luster, softness, and excellent drape, this delicate fabric is best for feminine attire, nightgowns, lingerie, linens, curtains, and drapes. Here is the short list of satin uses:
Evening gowns
Wedding dresses
Shirts and tunics
Lingerie
Clothes liners
Bedding
Curtains and Drapes
Upholstery
Footwear: ballet slippers, designer shoes
Belts
Evening purses and bags
Typical Satin Fabrics
Antique satin or satin-back shantung is woven on a 5- or 8-harness (shaft) loom using slub yarns (unevenly-spun novelty yarns) in the weft (filling).
Baronet has a cotton back and a rayon or silk front, similar to Georgette.
Charmeuse is a lightweight fabric in which the warp threads cross over four or more weft threads. Charmeuse is glossy in front and dull on reverse. Charmeuse may be made of silk, polyester, rayon, or blended yarns.
Crepe-back satin has a glossy satin front and a crepe texture in the back. Crepe-back satin is most commonly made of polyester and sold as make-believe silk. The real silk crepe-back satin fabric is very luxurious.
Duchesse is an 8- to 12-harness satin weave with closely positioned warp yarns. Duchesse is a dense fabric with a high thread count. Originally, Duchesse was made in France from silk, but it is increasingly made with synthetic fibers.
Sateen is a satin fabric that is woven with staple yarn such as cotton, wool, or linen instead of filament yarn. By definition, sateen cannot be made of silk or polyester as they are filament fibers.
Slipper satin is a strong medium-weight satin with a high luster used for women’s footwear, ballet slippers, garments, and accessories.
The three fundamental weaves are used for all intents and purposes. I hope that after reading this post, you are better equipped to shop for your clothing, drapery, linens, and upholstery to fit your personal needs.
All fabrics are classified by their construction and content. Fabric construction is how the fabrics are assembles from yarns or threads. The three main construction types are woven fabrics, knitted, and non-woven fabrics. Fabric content or composition, on the other hand, is the material that constitutes fabrics. This post summarizes fabrics by their content.
You can find types of woven fabric in this post: Three Main Types of Woven Fabric. I will be publishing knowledge-base articles on knitted and non-woven fabric types soon. Subscribe to my newsletter to receive notifications of new posts and my store discounts.
For now, let’s review fabric and yarn classification by composition.
Yarn & Fabric Classification by Content
The two types of textile fibers are natural and artificial (man-made) fibers. Natural fibers come from animals and plants while artificial fibers are synthesized from petroleum*, polysaccharides, proteins, and their blends.
* As a proponent of sustainability and transparency, I focus on natural fibers. I do not cover petroleum-based synthetic fibers in terms of their production and the fabrics made from them. However, petroleum synthetics are included in this classification to make the list complete and to know which materials to avoid when shopping for natural fabrics and clothing.
Natural Textile Fibers
Fibers grown in nature are found in animals and plants.
Animal Fibers (Protein Fibers)
Wool
Silk
Camelids:Alpaca, Guanaco, Llama, Vicuna, Camel (Dromedary, Bactran, and Wild
Mulberry
Goat:Mohair, Cashmere, Orenburg
Eri
Sheep:Merino, Rrambouillet, Shetland, etc.
Tussar
Rabbit:Angora
Muga
Yak
Ahimsa
Quivit: muskox
Chiengora: dog
Plant Fibers (Carbohydrate Fibers)
Seed
Bast
Leaf
Cotton
Flax
Manila
Kapok
Hemp
Coir
Jute
Kenaf
Ramie
Synthetic Fibers
Fibers synthesized in a lab or manufacturing facility from carbohydrates, protein, or petroleum, and their blends. These fibers and fabrics made from them are also known as synthetics.
Regenerated Carbohydrate (Polysaccharide Fibers)
Regenerated Cellulose
Bamboo and tree wood pulp: viscose (Rayon), modal, lyocell (Tencel)
Cotton waste: Cupro
Acetate: diacetate (acetate), triacetate
Regenerated protein (Amino Acid Fibers)
Animal-Based
Plant-Derived
Milk fiber (a blend of milk protein (casein) and acrylonitrile* (petroleum-based synthetic fiber used to make acrylic)) was produced in Europe and the US in 1930s.
Arachin (groundnut or peanut)
Aralac, Lanatil and Merinova
Soy
Azlon (casein copolymer (25%-60%) grafted with 40%-75% acrylic monomers, of which at least half is acrylonitrile, has been developed in Japan under the tradename Chinon.)
Kerry Hill Sheep catches attention due to its distinct color pattern resembling that of a giant panda. These sturdy, robust, and adaptable animals with a friendly and docile predisposition originated on the hills of Kerry in Powys county of Wales, United Kingdom in the 19th century. Kerry Hill sheep faced extinction, but only temporarily. The population quickly recovered thanks to the efforts and enthusiasm of small farmers. These medium-sized sheep can be found on farms of their origin in Wales and throughout the UK, Ireland, the Netherlands, Germany, and Denmark. They have recently been exported to the United States.
Kerry Hill Sheep
No wonder this dual-purpose breed is becoming increasingly popular! This hardy sheep has a sturdy body with deeply fleshed hindquarters and muscular necks. The mature ram weighs 140 to 155 pounds. The ewe weighs between 120 and 140 pounds. Both ewes and rams are hornless. They have white faces with black noses, black areas around the eyes, and black high-set ears. The faces and ears do not grow wool. The legs also have distinctive black markings.
Diagram of Kerry Hill sheep markings.Kerry Hill sheep at the show.
Kerry Hill sheep are very adaptable to their environment and farming styles. They have good foraging abilities and low cost winter requirements. They are ideal for small farms and homesteaders in the climates that permit a good amount of grass. Because of their calm and friendly nature, these animals are suitable even for a novice farmer. They are disease-resistant and prolific with a lambing percentage of about 175%. They are often crossed with Hill and Longwool breeds.
Kerry Hill sheep are excellent mothers.
Kerry Hill ewes are attentive and protective mothers. They produce milk in abundance. Lambs grow quickly reaching 35 pounds at 12 to 14 weeks of age.
Kerry Hill ewe with the lambs.
Shearing of Kerry Hill sheep produces 6 pound of fleece.
Kerry Hill sheep.Kerry Hill lambs are incredibly cute.
These cute creatures also make excellent pets. If I had a petting zoo, I would definitely own Kerry Hill lambs. Because of the pandemic though, a petting zoo is not an option for me at this time.
FLEECE
Raw Kerry Hill fleece.
Kerry Hill sheep is classified as Down breed.
Kerry Hill fleece is high quality, short, dense, and almost free of kemp. It is normally white or cream in color and 31.5 – 33 microns in diameter with a Bradford count of 54 to 56.
Scoured Kerry Hill fleece.
The fleece is among the softest of British wools being described as medium / soft. The wool is springy with a mild crimp.
The fleece handles very well by spinners. The staple length varies from 2 ¼ to 4 ¾ inches (6 – 12 cm).
Kerry Hill fleece staples.
Raw Kerry Hill fleece is low in lanolin and scores easily. Any length of fleece can be spun from the lock. It can also be combed, carded, or flicked prior to spinning. I usually card shorter fibers. Worsted style will produce a subtle shine while maintaining its loft and good insulating qualities. Woolen style will result in a matte-appearing yarn with even better air-trapping capacity.
Kerry Hill fleece rovings.
FIBER
This wool is white and very uniform, which makes it suitable for dyeing. It takes colors nicely.
Kerry Hill yarn in skeins.
The fiber makes a high-bulk yarn suitable for many weights and multiple techniques. The yarn will be relatively light weight with high grist numbers.
Kerry Hill yarn.
Kerry Hill fiber becomes spinners’ and knitters’ favorite very quickly. The fibers from the same sheep have a narrow range of diameters making them very uniform.
FABRIC
This friendly clear white fabric is soft enough and durable enough for a wide range of garments including sweaters and vests, caps and hats, mittens and socks. It is also suitable for household textiles, such as blankets or pillow cases.
FASHION
Bed throw made with Kerry Hill wool.Hand made stocking cap with Kerry Hill yarn.Felted vest made with Kerry Hill fleece.
Romney sheep originated in marshy areas of Kent, England. Being native to the area’s cold, humid, and rainy climate, Romney sheep is distinguished by its remarkable fitness and hardiness. The sheep is very disease resistant. It is especially known for its resistance to foot rot and liver flukes.
Romney sheep has a quiet predisposition and easy trainability making it a popular small flock breed. In spite of its great features, the breed continues to improve. Crossbreeding it with Leicester makes Romney even better.
Uses of Romney Sheep
Romney lamb.
After its export to New Zealand, this dual-purpose sheep became one of the most important sources of wool and meat export in the country’s economy comprising about 40% of New Zealand’s flock.
Romney flocks are very prolific and fast-growing. The yearling rams weigh from 175 to 275 pounds. The ideal market weight of 110-120 pounds is reached in four-to-six months.
Romney meat is known for its low fat and delicate flavor. The fleece has great luster and long parallel fibers with the minimal crossing of the locks.
Romney Fleece
Romney fleece has uniform and parallel fibers, medium crimp, and curled tips.
Raw Romney fleece.
Rainy and windy conditions created sheep with durable and weather-resistant wool.
Romney wool, measuring 29-36 microns in diameter (50s-44s), is the finest fiber among the longwool breeds. The crimp is uniform from butt to tip. Romney wool is a fiber of choice for hand spinners and a perfect fiber for beginners.
The wool has minimal shrinking with washing due to low grease content, making it a high-yielding fleece. It is sheared once or twice per year. Ewes shear 8 or more pounds per year and rams produce 12 or more pounds of fleece per year. The annual staple length is four to six inches.
White Romney fleece.
Romney wool is used for coats and sweaters, drapes, carpets, and upholstery. It’s not soft like Merino, but it is very durable. The durability makes it ideal for hard working conditions.
A lamb fleece of 30 microns or less may be used for sweaters on its own or as a blend with finer fibers for added luster.
The color of Romney fleece varies from white to gray, black, brown, or variegated.
Romney Marsh is a parent breed to Coopworth, Perendale, Romeldale, and California Variegated Mutant.
The Perendale breed was one of the numerous achievements of Sir Geoffrey Peren, the professor, the Principle, and the Chair of Agriculture at Massey Agricultural College. The school later became a part of Massey University in New Zealand.
Professor Peren took a major part in the creation of the breed by crossing Border Cheviot rams over Romney ewes. He continued to closely monitor the development of the Perendale breed.
The breed was developed post-World War II, in response to the declining production of Romney sheep and worsening soil conditions in the steep hills of North Island. The Perendale is a hardy dual-purpose sheep, which is well adapted for the mild and rainy oceanic climate.
Perendale Sheep Farming
The Perendale is a prolific breeder with excellent mothering skills, parasite resistance, thriftiness, and meat quality. Being a cross-breed, Perendale sheep have characteristics that vary between Cheviot and Romney.
North Island hills, New Zealand.
The breed is medium in size with adult ewes averaging 120-150 lb and rams 200-250 lb.
A cross with Merino produces exceptional offspring. The mature body weight of a ram is 220-260 pounds and a ewe – 120-150 pounds. The animals are easy to farm as they have a good predisposition, high fertility, and excellent maternal instinct. Dogging or excessive noise is not required in handling these sheep.
Perendale ewe with lambs.
Fleece
Ewe wool is super white in color. The fleece is 28-37 microns in diameter with fine and regular crimp. The annual sheering produces a staple measuring 100-150 mm (~4-6 in) in length. The fleece weight is 3.0-4.5 kg (6.6-10 Lb). The fiber is perfect for spinning and felting. It is excellent for beginners.
Raw Perendale fleece, natural white.
The fiber is low in luster, springy and crisp, but not harsh. It is free of kemp and black fibers. Although tensile soundness is an important characteristic of wool, the Perendale wool may be tender due to the low in nutrients vegetation under the harsh farming conditions of New Zealand’s hill country.
Raw Perendale fleece, gray.
Perendale wool is bouncy. And the spun fibers have a loft and spring to them. This characteristic of wool is different from the compact and sleep fibers of most English longwools. The lofty quality adds warmth to garments or cushioning quality to rugs and upholstery.
Perendale sheep fleece varies from white to red to gray in color.
The fleece with very fine crimp can be spun lightly to produce bulky garments with shape retention and good insulation properties. A tighter spin produces a round and hard-wearing yarn with the same properties. A true worsted yarn that is smooth and dense cannot be produced from the Perendale fleece.
References:
Teara; The Encyclopedia of New Zealand. Story: Peren, Geoffrey Sylvester. [Internet]. [cited 2022 Mar 29]. Available at: https://teara.govt.nz/en/biographies/4p8/peren-geoffrey-sylvester
North American Perendale Association. [Internet]. [cited 2022 Mar 29]. Available at: https://perendale.org/perendale-characteristics/
Association of New Zealand. Perendale – a spinner’s notes. [Internet]. [cited 2018 Sep 9].
The Spinning Loft. Perendale. [Internet]. [cited 2014 Sep 14].
Perendale Sheep Society of New Zealand. The Perendale… [Internet]. [cited 2014 Sep 14].
What is vicuna and why is it so popular in the world of fashion? Vicuna (or Vicugna) is a slender wild animal living in South America. It is famous for its very desirable and expensive wool. Why is Vicuna fleece expensive? Vicuna wool is some of the finest in the world along with Shahtooch, or the wool of chiru, a Tibetan antelope.
The other reason for the high price is its scarcity. Vicuna wool is rare for three reasons:
The vicuna hair grows very slowly and can be shorn only once every three years. Averaging 3.3 pounds per sheering, only a very small amount of wool can be obtained from a single animal.
The population of vicunas is very low. Vicunas were heavily hunted in the 1960s reducing the population to near extinction. Only because of the preservation efforts, the vicuna population grew from 6,000 in the 1970s to 350,000 adult animals today (2023).
The vicuna is the only animal of its type that cannot be domesticated because of its unusual mating behavior and brazen predisposition. Since farming vicunas is out of the question, the only way to collect its wool is to catch, sheer, and release the animals.
Facts about Vicuna
So what kind of animal is vicuna? Sometimes, people ask if vicuna is a type of goat or antelope without horns or a dainty little giraffe without spots. No, it’s none of those. The vicuna is the smallest member of the camel family. Genetically, vicuna is shown to be a predecessor of alpaca. Its genus name is Lama vicugna (aka Vicugna vicugna). Unlike alpaca, however, vicuna has never been domesticated.
Vicunas in the Andes
Vicuna Taxonomy and Evolution
Taxonomy: Kingdom: Animalia Phylum: Chordata Class: Mammalia Order: Artiodactyla Family: Camelidae Genus: Lama Species: Lama vicugna
Vicunas’ Habitat
Unlike other camels, the vicuna lives in South America exclusively. Andean native, vicuna chooses the semi-desert environment of the Central Andes at altitudes from about 10,000 to 16,000 feet (3,000 to 5,000 meters) above sea level. The highest population of vicunas is in Peru. They are also found in the mountains of Bolivia, northern parts of Argentina, Chile, and Ecuador.
One of the reasons for choosing mountainous habitat is an escape from predation. Puma is the main predator of vicunas. Half of the calf deaths and 91% of adult mortality are attributed to puma predation. Other predators are Andean foxes, and occasionally domestic dogs.
During daylight, the vicunas graze on the slopes and in valleys at lower elevations. They can see a predator at a distance in the open fields. When a predator is spotted, they will either escape or “team up” and threaten the animal. At night, vicunas move to higher altitudes. Their unprecedented agility on the rocks and avoidance of the active nocturnal pumas assure some safety in the darkness.
Fortunately, humans do not present a threat to vicunas anymore. Since signing the Convention for the Conservation of the Vicuña, the hosting countries protect this animal and promote its population recovery. In fact, the vicuna is the national animal of Peru representing the country’s natural wealth by virtue of its world-famous finest wool.
Vicunas’ Diet
A seasoned alpaca farmer once taught me to feed less alfalfa to my alpacas if I want them to have fine and soft wool. The logic behind this makes perfect sense. Hair is made of mostly protein (amino acid chains). If you want hair to grow thicker, you increase protein in the diet. If you feed low protein to your animals, their hair grows thinner. Alfalfa (aka Lucerne) is a legume that is very high in protein. In addition, alfalfa does not grow in the alpaca’s natural habitat.
Similarly, the vicuna’s diet is comprised of vegetation that is relatively low in protein. Their diet includes dry- and wet-grassland grasses and other plants such as graminoids and forbs. Because this vegetation is high in cellulose and poor in nutrients, the vicunas developed a specialized, so-called pseudo-ruminant, digestive system.
But, just like cows, sheep, and other ruminants, they also eat in 2 different stages. First, they graze in the morning and then rest and ruminate the cud in the afternoon. Their highly specialized digestive system allows them to consume fibrous and resilient desert plants.
Behavior and Reproduction
Vicunas are social and territorial animals. They form three types of groups: family, bachelor, and solitary herds. A family herd will occupy about 40 acres of land. Each family has one male and 5 to 15 females along with their offspring. Vicunas keep their grounds clean. They deposit their excrement in one spot just like alpacas. The male protects the territory and its residents from predators and other intruders year round. They are especially protective of their females during mating periods between January and April. Since the male is the main safe keeper, the females are not very protective of their young. They will leave their progeny in moments of danger.
The Golden Fleece of Vicuna
The appreciation of vicuna wool dates back to the ancient Incas who captured, sheared, and released the animals back to their habitat. The Incan tradition continues in modern times. The famous round-up festivals in Peru, Bolivia, Chile, and Argentina play a very important role in the countries’ economies.
During these events, the local Serranos, or the villagers of the Andes, gather in large groups to round up and capture the elusive vicunas. They shear the valuable fleece and release the animals. The wool is then shipped to Europe for processing and turning into exorbitantly-priced garments only suitable for the extravagance of the rich.
The roundup process is laborious and unpredictable. Small mistakes can lead to big failures. Frustrating for the catchers, vicuna fleece harvesting contributes to the local economy. For example, Peru exported seven tons of vicuna fleece and profited by three million US dollars. In comparison, the export of the farmed alpaca fleece yielded a hundred times higher profits that year.
The largest profits are gained through processing the fleece and making garments. Seasonal vicuna wool processing facilities are costly and not justifiable within the local economies.
The first consideration in clothing design is the function of the garment. Upon establishing the purpose you can develop the specific design. The design idea may be inspired by haute couture shows, street fashion, window shopping, lookbooks, or catalogs. Many designs are created by combining various elements.
Decide on the function of the garment you are making:
Formal wear
Casual outfit
Work/business clothing
Sports/active wear
Convert the design idea into a sketch.
A sketch helps to visualize and evaluate the design.
Analyze the design while keeping in mind:
special qualities in the shape of the wearer;
matching the garment elements (eg. sleeves matching the collar, etc.);
characteristics of the fabric being used (in some cases, a garment is designed for the fabric that is already purchased).
Add final touches.
Purchase the material appropriate for the design, or adjust the design for the existing fabric.
Pattern Drafting
Pattern drafting is simply altering the fabric to fit the shapes of the body.
Three Ms of pattern drafting:
“Mode” or style of clothing reflected in the sketch.
“Material” or fabric that is chosen for the garment.
“Measurements” of the person who will be wearing the piece of clothing.
Before starting the draft
Understanding the contours of the body and learning how to shape the flat fabric to fit these three-dimensional contours is essential for pattern drafting.
Determine such things as seam and dart placements, as well as the types of openings for the garment (eg. lacings, buttons, hooks, eyes, zippers, etc.) Examine the material for its properties of draping, weight, and flexibility.
Fitting
While drafting establishes the basic location of the seams and the darts, the fitting establishes their exact location and makes it possible to compensate for the individual contours of the body. Before the garment is complete, it should have two accurate fittings.
With the first fitting, adjustments are made and secured by pinning.
The second fitting is done with the garment basted together and is a recheck of the first fitting. Once the garment has been carefully fitted, it is ready for the final sewing operation.
Fabric and the Body
The body has three dimensions: height, width, and depth.
Shaping Fabric
A fabric, just like paper, will bend smoothly in one direction at a time. The contours of the body bend in many places in several directions at once. Therefore, the fabric must be shaped to follow these contours. The shaping tools in garment construction are known as darts and seams.
Pattern drafting is the process of locating these darts and seams so that the fabric would lay flat where the body is flat and bend where the body bends.
Darts
A dart is a “V’ shaped wedge that is removed from the fabric so that the fabric will bend in two directions at the same time.
Joining Seams
Three types of joining seams:
A flat seam (as in patchwork quilts) is a seam that is added to fabric without changing the shape of the fabric at all as in two flat pieces of fabric sewn together (e.g. decorative seam)
Seams may be used instead of darts to bend fabric in two directions simultaneously (e.g. princess seam)
Seams may be used to shape fabric so that it will bend in more than two directions at a time as shown in the illustration of a mandarin collar.
A chart of knitting needle sizes in millimeters and their corresponding codes used in the US, UK, and Canada.
If you are not sure what size needle should be used for your yarn, this rule of thumb may help: choose needle diameter that is twice the diameter of your yarn.
How many times have you drafted a bodice pattern following instructions, only to have your head spinning at the end of this project and still not understanding how you got there? I’ve done it too many times. So, I decided to make changes in my approach to the pattern drafting to save time and eliminate the fatigue and frustration.
What makes my approach simple is that you are working on one section at a time until finished. It takes you only a few seconds to complete each section. (May be, with the exception of the arm and neckline curves simply because you need to exercise some care and take time to make the curves smooth.) Also, if one measurement is used in different parts of the block, this measurement is used all at once, and you don’t have to look it up or calculate it again.
If it does not make sense right now, do not fret. It will all come together once you try to follow the directions and draw the pattern this way.
You will need large pattern paper (or any other large paper from a roll). I use medical office lining paper because it is transparent and cheap. Optional: self-healing cutting mat. I lay my transparent (parchment like) paper on the mat. This way, I can see the grid through the transparency of the paper. It works very well.
You’ll also need a long ruler, pencil, eraser, French curve, and a measuring tape to take your measurements if you have not done it yet.
Measurements
You will need only nine measurements for this project. The detailed description of the measurements can be found in a separate post (coming up soon).
Below is the list of the parameters.
Horizontal Measurements:
Neck Circumference – full circle around the neck at the nape.
Bust Circumference – full circle around the fullest part of the bust.
Waist Circumference – full circle around the narrowest part of the torso.
Bust Span – bust point to bust point.
Shoulder Length – nape of the neck to the shoulder tip.
Back width – distance from arm to arm at the scapula (shoulder blade) level.
Vertical Measurements
Armscye Depth – nape of the neck to the shoulder blade line where the back width was measured.
Bust Height – shoulder to bust point (the highest point of the bust).
Waist Height – nape of the neck to waist in the back.
Now, that we have all the measurements, let’s start building the block.
Neck, Bust, and Waist Lines, Guidelines
Mark a starting point S close to the top left corner of your paper leaving some space around the starting point. From this point, draw a vertical line extending above and below it.
The vertical line is the Center Back of the block and the grainline of the back pattern.
Center Back line extends above and below the Starting Point S. The line above is only a few inches long.
Markings on the Center Back Line:
N1: Neckline: Measure 1.5 cm (5/8″) above the starting point S – mark this point N1. (N for neck.)
S1: Sleeve/Shoulder Head Guideline: Divide the armscye depth measurement by 5 and subtract 0.5 cm (1/8″). Mark this distance from starting point S measuring down as point S1(S for sleeve and shoulder).
D1: Shoulder Dart Guideline: Mark point D1 15cm (6″) down from starting point S, on the Center Back Line. (D for dart.)
A1: Armscye Line: Add 0.5cm (1/8″) the Armscye Depth. Measuring from point S down, mark this distance on the Center Back line. Label this point as A1(A for arm/armscye).
B1: Bustline: From point N1, measure down the Bust Height. M mark this point B1 (B for bust).
W1: Waistline: Measure the Waist Height down from starting point S, and mark it W1(waist).
Mark all vertical measurements on the Center Back in one setting.
Here is the summary of the vertical distances:
Summary of vertical measurements.
Now, that we marked all necessary points on the Center Back line, let’s move on to the horizontal measurements and the Center Front.
Horizontal Lines:
We will be using Adjusted Bust Circumference:
Adjusted Bust Circumference = ½ (Bust Circumference + Ease)
Only one half of the Bust Circumference and Ease are used for the pattern because the pattern is made for one half of the garment. The Center Back and Center Front are the lines running through the middle of the body. The lines will coincide with the midline of the garment.
The same holds true for the ease. Only half the ease is used on the half of the pattern. For example, if the ease to the bust is 6 cm (2 1/5″), add 3 cm (11/4″). Remember to halve the amount of ease, before adding it to your half bust circumference.
Build the Block Using Adjusted Bust Circumference
Block: Draw horizontal lines equal to Adjusted Bust Circumference from points N1 and W1 to the right. Mark endpoints as N2 and W2, respectively. Connect N2 and W2 to form a rectangle. The vertical line on the right is the Center Front line.
Sleeve Head Guideline: Draw a horizontal line from point S1. This is only a guideline. It does not need to have a specific length.
Back Shoulder Dart Guideline: Draw a horizontal line from point D1. Same as above, this is just a guideline. It does not have to be a specific length.
Armscye Line, Bust Line: Draw horizontal lines from points A1 and B1 to the Center Front. Label the intersection points as A2 and B2, respectively.
Draw the horizontal lines in one setting.
To summarize:
The only horizontal line, that we have not included yet, is the Front Shoulder Guideline. You will see very soon, why it is added later.
Front Shoulder Guideline will extend inwards from the Center Front.
Now, that we’ve built the basic block, we can move on to the outlines of the pattern starting with the Back and Front Necklines.
Back and Front Necklines
On the Neck and Shoulder Line:
The measurement used for this section is the Neck Circumference divided by 5. It is easy to see that the back neckline should coincide with the front neckline at the shoulder seams. That’s why, the same measurement is used for both.
N3: Back Neckline: Mark 1/5 of Neck Circumference from point N1 to the right. This will be point N3.
N4: Front Neckline: Mark 1/5 of Neck Circumference from point N2 to the left. This is point N4.
Mark the neckline distance in the back and front on the pattern block.
On the Center Front Line:
Front Neckline: Mark 1/5 of Neck Circumference (same measurement) from point N2 down. Mark as N5.
Mark the neckline distance on the center front line.
In summary:
Summary of the neck measurements.
Front Shoulder Guideline: Mark a point 0.5 cm (1/8″) up from N5 on the Center Front line and draw a horizontal line from this point. This is just a guideline, so it doesn’t have to be a specific length.
Draw the front shoulder guideline.
As you can see, we used the same measurement in two corners and the Front Neckline mark was used as a starting point for the Front Shoulder Dart Guideline. Easy!
Necklines
Connect points N1 and N3 with a smooth shallow curve to form the back neckline. Check that the line is at the right angles* at the Center Back line and the shoulder seam.
Connect N4 and N5 with a deep curve keeping the right angles* at the seams. This is the front neckline.
* When working with curved lines, always check that they come to a right angle when they meet a straight seam or fold (for example, the center front, center back, or the side seam). By doing this, you ensure that you will get a nice smooth curve where the back and front necklines join.
Draw curved necklines.
We continue working in the upper section of the block around the neck and shoulders. Let’s move on to the seams and darts.
Back Shoulder Seam and Dart
Add 1.5 cm (1/2″) to the Shoulder Length (this is the allowance for the shoulder dart). Use a ruler to pivot this distance from point N3 until your measurement passes through the Sleeve Head Guideline (the horizontal line drawn from point A1). Draw a straight line to create your shoulder line. Label the endpoint S3.
Draw a back shoulder seam line.
Mark M3 the midpoint of the back shoulder seam (line N3S3). Mark a point 1.5 cm (1/2″) from M3 toward S3 (to the right) and label as point M1. Draw a vertical line from midpoint M3 down to the Back Shoulder Dart Guideline. Mark a point 3 cm (1 ¼”) from the intersection point toward the Center Back and label as point D2. D2 becomes the point of the back shoulder dart.
Make the marks for the back shoulder dart.
Connect M3 to D2 and M2 to D2 to create the dart arms.
At this point, the shoulder segment of the dart (connection between M3 and M2) and the auxiliary vertical line can be erased.
Summary:
Draw the back shoulder dart.
Let’s move on to the front shoulder and dart. First, we need to mark the Bust Point.
Mark the Bust Point
Divide the Bust Span by two (as we are working on the half) and add 0.5 cm (1/8″) (allocated ease).
Measure this distance from point B2 to the left on the bust line. Mark it as the Bust Point.
Mark the bust point.
Draw a vertical line passing through the Bust Point and intersecting all your horizontal lines. This is the Vertical Bust Line.
Draw the vertical bust line.
Mark point D3 1 cm (3/8″) above the Bust Point on the Vertical Bust Line. This will be the point of your dart.
Mark point D3 on the vertical bust line.
Front Shoulder Dart
This equation is from Burda Style tutorial.
Add or subtract 0.6 cm (1/8″) to 7 cm (2 3/4″) for each 4 cm (1 1/2″) bust increment above or below 88 cm (34 1/2″). For bigger busts you will need a larger dart (add to 7 cm), and for a smaller bust you will need a small dart (therefore subtract from 7 cm).
For example, if your bust circumference is 84 cm (33″), which is 4 cm (1 1/2″) below 88 cm (34 1/2″), you need to subtract 0.6 cm (1/8″) from 7 cm (2 3/4″), leaving a dart width of 6.4 cm (2 1/2″).
Use this dart width calculation to mark this distance from N4 as point S4.
Connect S4 and N4 to D3 with straight lines to create the front shoulder dart.
Create the front shoulder dart
Front Shoulder Seam
Using a ruler, pivot from point S4 the Shoulder Length until it crosses the Front Sleeve Head Guideline (Front Shoulder Guideline). Draw a straight line creating your front shoulder line. Mark the end point S5.
Draw the front shoulder line.
Drafting the Armhole
On the Armscye Line (A1A2), measure the distance of half of the Back Width plus 0.5 cm (allocated ease) from point A1. Mark this point A3. Draw a vertical line from point A3 upwards until it reaches Sleeve Head Guideline. Find a midpoint between A3 and the intersection with the Sleeve Head Guideline. Mark this point M5.
Make a guideline for the armscye on the back pattern.
Take the distance from the Center Front to Bust Point (i.e length from B2 to the Vertical Bust Line or half Bust Span plus 0.5 cm) and mark this distance on Armscye Line, measuring from the dart arm closest to Center Back. Mark this point A4.
Draw a vertical line from point A4 upwards until it intercepts with the front shoulder seam.
Divide Armscye Depth by 5. Mark this distance on the line just drawn from A4, as point A5.
Make a guideline for the armscye on the front pattern.
Find the midpoint of the line between A3 and A4 and mark as M6.
Draw diagonal lines (lines drawn at a 45-degree angle) inwards from points A3 and A4. From A3 the line is 2.5 cm long (1″) (mark endpoint as A6), and from A4 – 1.5 cm long (1/2″) (mark endpoint as A7). These diagonal lines will help in the next step, when we draw the armhole curve.
Mark the endpoints for the armscye.
Summary of Measurements:
Summary of the armscye measurements.
Connect points S3, M5, A6, M6, A7, A5, and S5 with a smooth line.
Connect the endpoints to create a smooth armscye line.
Creating Waist Darts
At this point, the Waist Line is the same length as the Bust Line. Our Bust Circumference, however, is usually greater than our Waist Circumference. To remove this excess girth from the waist and to create a well-tailored pattern we need to make waist darts (one in the back – remember this is on the half so when you make your block there will be two in the back, and one in the front, as well as slightly tapering side seam, which we will also treat as a dart at this point).
Dart Width Calculation
Subtract Waist Circumference from Bust Circumference and divide it by 2. Add 2 cm (7/8″) ease (which adds a total ease of 4 cm (1 1/2″) throughout the waistline).
Divide this number by three, so that it can be distributed evenly throughout the back dart, front dart, and the side seam. This is the dart depth (width).
Back Waist Dart
To mark the placement of the back waist dart, find the midpoint of line A1A3 and label as D4. Draw a vertical line from this point so that line intersects the Waist Line (W1W2). Mark the point of intersection as point W4. This will become the center of your back dart.
Mark the endpoint and the guideline for the back waist dart.
Distribute the dart depth evenly on either side of W4 and join endpoints to D4 to create dart arms.
Side Seam
Draw a vertical line from M6 until it intersects the Waistline (W1W2). Mark the intersection point as W3.
Draw the side seam guideline.
For simplicity treat the side seam (line M6W3) as a dart at this point. Distribute one third of the dart depth to the back of the bodice and two-thirds to front of the bodice, either side of W3. Join the endpoints to M6 to create the front and back side seams.
Side seam (dart)
Front Waist Dart
Mark the intersection point between the vertical bust line and the waist line as W5. Distribute dart depth evenly each side of W5 and join the endpoints to a point 1cm (3/8″) below the Bust line to create dart arms.
Draw the front waist dart.
Balance the Waistline
At this point the waistline of the pattern is straight. But as the front of our bodice must pass over the fullest part of the chest (the bust), we need to add a little extra length to our Center Front, to prevent this part of the waistline from riding up when the bodice is made.
Mark a point 0.5 cm (1/8″) to 1.5cm (1/2″) down from point W2.
(0.5 cm (1/8″) for small bust / 1 cm (3/8″) for medium bust / 1.5 cm (1/2″) for large bust)
Connect point W1 to point W6. Extend the dart arms to reach the adjusted waistline.
Balance the waist line.
Complete the pattern outline by connecting S to W1 and N5 to W6. And finish the darts by capping them.
Complete the pattern outline.
Trace the pattern
The pattern is done. All you need to do now, is trace the front and back parts of the pattern onto separate pieces of semi-transparent paper including all details.
These side slant pockets are comfortable and very useful for pants and shorts, skirts and dresses. You can make them as deep as you wish.
Construction of Side Slant Pockets
The side slant pockets become a part of the front piece of the garment. For example, if you are making pants, you will attach the pockets to the front pant patterns. Making pockets is the first part of your garment assembly. After the pockets, you can attach a zipper, and finally, sew the pieces together.
What fabric should be used for pockets?
Fabric used for pockets or pocketing fabric should be thin and strong at the same time.
A pocket pouch consists of two layers of fabric that lay underneath the main material of the garment. This fabric has to be thin so that it doesn’t stand out in relief. The pockets should be unnoticeable unless the pockets are prominent by design.
In addition, you need very strong fabric for obvious reasons, – you don’t want your pockets to rip and lose their valuable content.
Natural pocketing materials are cotton and linen. Personally, I like ticking cotton fabric for my pockets. It’s thin and strong at the same time. But ticking cotton can be expensive.
Another material used for ticking is Silesia fabric named after its place of origin. Silesia is an historic region in Central Europe spreading throughout Poland, the Czech Republic, and Germany.
The pocket construction consist of three parts: two pocket liners and one visible patch. Personally, I like using ticking material for my pant pockets. The visible patch is made of the same fabric as the remainder of the garment you are making.
The method consists of two steps:
Step 1: The front pocket liner is attached to the front piece of the garment.
Step 2: The back pocket liner is attached to the front pocket liner.
It’s that simple! Let’s review the method step-by-step.
Step 1: Attaching Front Pocket Liner to the Front Piece of the Garment
Prepare Pocket Liners
Use the front piece of the garment to make the total of four pocket liners: front and back liners for two pockets.
The liners should be as wide as the front piece of your garment.
Use thin, but durable fabric for your liners.
Make a Visible Patch
We will attach the visible patch to the back side of the pocket that is showing through the opening. It is made of the same fabric as that used for the garment itself. As an option, you can make the entire back liner of the pocket with the garment fabric. But, if it’s too thick, the pocket may show through.
Create Pocket Slant in the Front Garment Piece:
Measure along the waste line 2″ from the side seam towards the center and mark the top edge of the slanted opening. The 2″ distance is optional. You can make it bigger to give your pocket opening more slant.
The pocket opening should be wide enough to fit the hand with 1″ margins on each side.
Mark pocket corners. You can use a pencil or make small nicks with scissors.
Next, fold the pocket slant along the bias.
Because the fold runs along the bias, it can easily stretch and lose its shape. To avoid stretching, we need to reinforce the folding line with an adhesive liner or by making several quilting seams along the side of the line that will be folded so that the quilting seams are not visible in the final garment. (I use a cotton adhesive liner.)
Fold along the line. The quilting stitches should be hidden.
Make sure, you have strong quilting stitches and/or tape to reinforce the bias edge.
Attach the Front Pocket Liner to the Front Garment Piece
Cut off the triangle from the side of the pocket liner to match the pocket slant.
Align the pocket liner with the front piece of the garment and fold the slant. Pin it to prepare for stitching.
Stitch from the right side along the fold using thread and stitch selection that matches the color and texture of the fabric and the desired style. This seam will be visible. The photo below shows the white thread for demonstration purposes.
Next, stitch along the folded corner of the front garment piece and the front liner of the pocket.
Step 2: Sewing Together the Front and Back Pocket Liners
Prepare the Back Pocket Liner
Use zig-zag or overlock stitch along the curved edge of the visible patch.
Attach the visible patch to the top side of the back liner by stitching along the curved border.
Align the back pocket liner to the front garment piece making sure that the corresponding marks (nicks) in the seam allowances line up.
The next step is to sew the two pocket liners together.
Attach the pieces at the corners and reinforce the pocket opening with additional zig-zag stitches.
You can iron the front part of the garment at this time. The pockets are ready.
After finishing the first part of the project, I took a little break. Finally, I returned to my sari silk pillow and finished it. When I started my project, I intended to make two pillows with the sari silk top on one side and cotton fabric on the back. In this process, I couldn’t find cotton fabric in my stash that would be a perfect match. I did not want to go shopping because of the COVID-19 pandemic. So, I ended up combining the two woven tops and constructing one pillow.
To make it more visually interesting and versatile, I changed the order of colors in my second pillow top. The first part has orange on the outside and green inside. The second part is just the opposite, with green on the outside and orange strips in between the green ones.
Both sides are so pretty! I cannot make up my mind about which side I like better.
The second woven pillow top hot off the loom
The next step was to use the same silky liner and embellish my sham with cotton lace. The result was just as adorable as the first half of the project.
The irregularities in the fabric grain render the handiwork a more authentic look.
After finishing the liner and embellishments, I reinforced the fabric edges with a so-called sewn-out zig-zag stitch. It was not absolutely necessary, but I wanted to add some extra durability.
Finally, the two pieces were combined to complete the pillow case with a small opening on one side.
Finished pillowcase with a small opening on the right for stuffing.The pillowcase on each side.
The fluffy stuffing was distributed with care to make sure that every corner has an equal amount of stuffing and that the pillow looks and feels very smooth and even. And here it is, stuffed and smiling at you like a happy seal basking on a beach.
Stuffed pillow ready to be sealed.
The parts of the opening were hand-stitched together. The pillow is finished.
Sari silk and cotton decorative pillow collage
I hope you enjoyed reading about my project and looking at the pictures.
Mastering how to weave had been a dream of mine for a long time. A few weeks ago, I finally took my first weaving lesson. After finishing my study practice, and mastering a few skills and designs on my own, I decided to create a sham sari silk pillow.
A couple of years ago, I was on a shopping spree for bright and colorful Indian saris. Some have very intricate prints, and some are more simple and elegant. I use them for tunics, curtains, ribbons, and various decorative items. When you purchase things on line, however, you don’t always get what you think you are buying. So, two of the saris I bought looked a little different in real life. The colors weren’t exactly what I expected, and the fabric had very little drape. Drape, by the way, is a quality of fabric describing how fluid or rigid the fabric is. The more drape the more fluid and silky the fabric. Well, these saris didn’t have the desired drape for my purposes. See the picture of the two saris below.
Silk saris from India
Each sari is about five yards long. I decided to cut them into 3/4 inch-wide strips lengthwise, and use them for as a weft in my weaving project. Woven fabric has two basic components, warp and weft. Warp is a longitudinal yarn/thread, and weft is made of crosswise fibers. I decided to use mercerized cotton for my stationary warp fibers.
The colors of the saris are very bright and saturated. I needed to dilute them with something light and neutral. White cotton was my color of choice in this case.
I put the mercerized cotton warp on the loom and started weaving with the silk sari strips in alternating colors.
One-inch-wide silk strips are being converted to a new woven fabric.
This is what I fashioned for the decorative top of my silk sari pillow.
My raw fabric.
Although, I have introduced a good amount of white in this colorful combination, I felt that I still didn’t have enough light-colored neutrals. So, I decided to break the pattern with an off-white cotton lace. The photo below shows the close up of the lace embellishments stitched to the silk. You will see later how the stitching was done.
Cotton-silk woven fabric embellished with off-white cotton lace.
The silk sham is lined with another fabric for added durability and a sleek luxurious feel. The material I found is a very smooth and silky liner fabric.
This liner, by the way, is an example of a fabric with a very good drape. See how smoothly it folds without creases or crinkles?
Pillowcase liner.
Weaving this sari silk changed its texture altogether. It became very soft and warm to touch. The drape was greatly improved. It feels almost like a knitted silk fabric.
Because the sari silk top and the liner are both very sleek and flowing, they float easily past each other when being handled. I had to use this special contraption called walking presser foot. It is so complicated that it comes with its own user manual.
Walking presser foot is used for quilting.
This presser foot is designed specifically for quilting or sewing multiple layers of very sleek fabrics. It advances all layers of fabric equally with each stitch. Sorry for getting too technical here. I just wanted you to know that this lace adornment was handled very slowly and with surgical precision. The liner fabric was being quilted to the sham at the same time. It is on the bottom of the assembly and not seen in the picture below.
Quilting the sham and the liner and adding lace at the same time.
You can see the back side of the sham in the photo below. An unfinished matching sham is in the background.
Back side of the quilted pillowcase.
Below is the finished and lined top part of the pillowcase.
Finished cotton and sari silk pillowcase top with cotton lace.
The type of weave and the liner had transformed very crispy saris into a very soft and luxurious piece.
Silk sari pillowcase is ready to be assembled.
I am happy with my work and with the result. The next step is to make a matching sham to complete the decorative pillow.
Mercerized cotton (warp) and silk sari strips (weft) on a rigid heddle loom.
Move on to Part II of my sari silk pillow project to see the final result.
Alpaca clothing are made on different levels ranging from large fashion manufacturers to individual artisans. Every process of turning Alpaca wool into fabric or a knitted garment is essentially the same with some variations regardless of who makes it.
The steps in alpaca fleece transformation into clothing include
Sheering alpaca;
Skirting: the removal of debris from alpaca fleece;
Washing and dyeing fleece (dyeing is an option);
Picking clean alpaca fleece;
Carding or combing the fleece;
Spinning and plying alpaca fleece into yarn;
Washing yarn. (Dyeing can be done at this stage if the fleece wasn’t dyed earlier.)
Making knitted, woven, crocheted, or felted fabric and clothes from the yarn.
Washing fabric or garment. (And again, dyeing or printing can be done at this stage as well.)
Blocking fabric or garment.
These basic steps of turning alpaca fleece into a garment can have some variations depending on the clothing design and purpose. For example, the dyeing process may happen after washing the fleece or after spinning fleece into yarn. Alternatively, fabric or even the garment itself can be dyed or printed much later in this process.
Oftentimes, you can skip dyeing wool if you want to have natural colors. That’s what I did this time in my project. I selected my fleece based on the natural color of the animal itself. My project resulted in a very rich chestnut-brown piece.
Once a year, in early spring, farmers sheer their alpacas. The animals feel very good after this alpaca sheering. It’s like taking your pet to a groomer or going to a spa.
Removal of Debris from Dry Alpaca Fleece
Skirting and Cleaning Raw Alpaca Fleece
When a alpaca farmers sheer the animals they obtain so called raw fleece. Raw basically means that the fleece is in its virgin state before washing. This fleece has plenty of dust, debris from vegetation that the animals rub on, dirt or staining under the tail, grains or feed grass on the neck and chest areas, etc.
While the alpaca runs around happily from feeling light and liberated after sheering, the farmer does the dirty work of skirting. Skirting is manual removal of soiled and stained parts of the fleece. Typically, it’s the farmer, the family members, farm employees, seasonal or outsourced laborers, or any other helpers do this part of fleece cleaning.
I always imagined that skirting work is very tedious and monotonous. But, when I watched private small farmers do this work I was amazed how quickly and efficiently they go through one fleece after another.
Farmers’ goal in this process is to remove the smelly and unattractive stuff and large pieces of vegetation from the raw fleece to make it presentable on the market.
Drum-Cleaning Alpaca Fleece
The next step of this cleaning process is to remove as much dust, seeds, and vegetation from alpaca wool as possible. This process also takes place on the alpaca farm. A farmer places dry skirted alpaca fleece into a large drum. It’s a cylinder made of metal mesh. The drum spins just like clothes dryer with the alpaca wool inside. If you have seen a raw sheep fleece you know that it looks like a carpet. Alpaca fleece, on the other hand, looks like separated locks of wool. When it tumbles in the drum, small vegetation and dirt particles separate and fall through the metal mesh while the wool stays in the drum.
This is where the farmer’s work ends. Normally, farmers don’t wash their fleeces unless they also spin yarns and make clothing. A yarn spinner typically does the fleece laundry.
Purchasing Alpaca Fleeces
A spinner is a person who spins fleece into yarn. I buy my fleeces from farmers and go through the entire process of turning alpaca fleece into garments and other items.
I went to a small family owned and operated alpaca farm. Judy and Ron have a picturesque setup on grassy rolling hills with a pond in the middle. The farm hosts 23 alpacas that roam, play, and interact with curious visitors. When the visitors are not around, two vigilant Great Pyrenees dogs guard the fancy alpacas. Every alpaca has a name. And every bag of sheered fleece has the animal’s name on it so that the owner knows exactly the origin of any specific fleece.
So, I bought two fleeces from Ron and Judy and brought them to my Wool Barn to transform this natural beauty into something to wear for me and my family.
Below is the photo of the alpaca fleece that I bought from my friends. This fleece is sitting on a drying rack covered with a breathable burlap after all night of drying. I already washed this batch. Raw alpaca fleece looks almost exactly the same.
The Scouring Process
The next step in this alpaca wool journey is to wash the fleece or scour the fleece to be precise. Scouring is the process of washing raw fleece.
Scouring Sheep Fleece
I think that the reason for the word “scour” is that we use a very strong detergent to wash sheep fleeces. That’s because raw sheep wool contains lanolin. Lanolin is a wax that lubricates sheep’s coat and protects it from matting. Removing lanolin is not an easy process.
Scouring Alpaca Fleece
On the contrary, alpaca fleece does not have lanolin or any other fats. Raw alpaca fleece feels very dry to touch. But regardless, alpaca’s wool still needs washing from dirt and vegetation (vegetable matter or VM).
Some fiber artists combine fleece scouring with dyeing. By doing so, they eliminate an extra drying and re-wetting step and reducing the risk of felting. Any animal fibers should be washed with great care.
A combination of water, soap, and agitation can easily turn fleece into a felt. In fact, that’s one of the felting methods. A soapy wet fleece is evenly spread on a large table. This table has a lid made of a flat metal sheet of the same size and shape as the table top. If you turn the switch, this sandwich contraption starts to vibrate. The rubbing motion of the metal plates against each other felts the fleece into a felt fabric.
So when you wash wool, and it can be any wool, you always have to think about felting and how to avoid it. (The only exception is superwash wool, but we won’t talk about it in this post.) Each time you make your wool wet, you encounter a risk of felting.
In my case, however, I selected fleeces from a very deep red alpacas so that I could use their natural colors without having to dye my wool.
Picking and Carding alpaca Fleece
This is really like a wool spa. After washing and drying your fleece you want to align the individual fibers to prepare them for spinning. There are different tools for this depending on what you want to get in the end. The first step in separating the fibers is picking.
A picker is a tool that separates fibers without lining them up. The long box in the foreground of the picture below with nails sticking in two directions is the picker. The fleece on the right dry and clean alpaca fleece after scouring. The fluffy bunch on the left is the fleece of alpaca fibers after picking.
In the same picture above, the contraption with the belt behind the alpaca fleece is the drum carder. Carding will be the next step in preparing my alpaca fleece for spinning.
After I finished picking, a pile of alpaca fleece turned into quite a mount of fluffy fleece (below).
Carding Alpaca Fleece
Just like in pet grooming, you would brush your pets after giving them a bath. The same holds true with fleeces. The only difference is in the name. We call it carding. When you card wool, you feed small portions of fleece into the small drum of the drum carder and let the tool do its work.
The result after the first run may be still quite lumpy. If that’s the case, you need to repeat the carding until it looks smooth and lined up.
Preparing Alpaca Fleece for Woolen Spinning Method
If you take a close look at a carded alpaca wool, you will see that the fibers are not strictly parallel, but rather with some degree of freedom. That’s because I prepared my alpaca fleece for a so called woolen spinning method.
This blanket of carded fleece is called a batt.
At the end of the carding stage, I rolled the batts into wool burritos called rolags. We make rolags for the woolen type of spinning and top rovings for worsted spinning. I will describe the difference between woolen and worsted spinning in a different post. Please see the Glossary of Spinning Terms for definitions.
Washed and picked alpaca fleece in the background and the resulting rolags in the front.
I prepared my alpaca wool for spinning in woolen fashion for a very warm but delicate lace cowl.
Spinning Alpaca Fleece into Fiber
Alpaca yarn on the bobbin of the spinning wheel.
As you can see, when the fleece is fluffy, it looks light, but when it is condensed in a spun fiber it becomes very rich chestnut brown in color. After spinning yarn, I usually let it stay on the bobbin for 24 hours before removing it from the bobbin. The newly-spun yarn sets by the tension during this time.
Sometimes, I feel very inpatient when the yarn is setting that I want to keep working on it. But a day of rest is very important for the yarn quality. When the yarn was finally ready for plying, I double plied the treads with an intention of keeping my yarn very thin.
After plying, I transferred my two-ply yarn onto a niddy-noddy, washed and dried the yarn, and wound it into a ball with the yarn winder. You can see this section of the process in my earlier post, White-and-Blue Romney Wool Rugged Mittens.
Unlike the yarn in my mitten project, this 100% alpaca yarn is very fine as you can see it on the photo below. This lace-weight yarn is ready for knitting.
Knitting my Lace Cowl
The pattern for my cowl is very intricate. Usually, I don’t use commercial patterns. I design my own garments instead. Knitting this cowl was a laborious process. I used circular knitting needles for the body of the cowl. Then, I crocheted the border with a very fine wooden crochet hook made of Sorbus (Rowan or European Ash) tree.
I was very happy with my resulting project. See how happy I am in the photo below?
back post double crochet: Yo and draw up an lp around the post of the next st at the back of work 1 row below inserting the hook from right to left, (yo and draw through 2 lps on the hook) twice.
BPdtr
back post double treble crochet
BPhdc
back post half double crochet
BPsc
back post single crochet
BPtrc
back post treble crochet
BP
back post: crochet into the post inserting the hook at the back of the work.
beg
begin/beginning
bet
between
BO
bobble: Yo, insert hook into st and pull up an lp. Yo, pull through 2 lps. Rep first step in the same st/sp until you have a total of 6 loops on the hook. Yo, pull through all 6 lps at once. Sc in the next st.
cm
centimeters
ch
chain
ch-sp
chain space
CL
cluster
CA
color A
CB
color B
cont
continue/continuing
CC
contrasting color
x-st
cross stitch
dec
decrease/decreasing
dbl
double
dc2tog
double crochet 2 stitches together: Yo, insert the hook in the next st, yo, draw the yarn through the st, yo, draw the yarn through the first 2 lps on the hook, yo, insert the hook in the next st, yo, draw the yarn through the st, yo, draw the yarn through the first 2 lps on the hook, yo, draw the yarn through all 3 lps on the hook.
dc
double crochet: Yo, insert the hook in the st to be worked, yo, draw through the st, yo, draw through the first 2 lps on the hook, yo, draw through the rem 2 lps on the hook
dtr / dbl tr
double treble crochet: Yo the hook 3 times, insert the hook in the st to be worked, yo, draw the yarn through the st (yo and draw through 2 lps on the hook) 4 times.
ea
each
edc
extended double crochet
ehdc
extended half double crochet
esc
extended single crochet
foll
follow(s)/following
FPdc
from post double crochet: Yo and draw up an lp around the post of the next st at the front of the work 1 row below inserting the hook from right to left, (yo and draw through 2 lps on the hook) twice.
FL
front loop(s)
FLO
front loop(s) only
FP
front post
FPhdc
front post half double crochet
FPsc
front post single crochet
FPtr
front post treble crochet
FP
front post: crochet into the post inserting the hook from right to left at the front of the work.
g
gram(s)
grp
group
hdc2tog
half double crochet 2 stitches together
hdc
half double crochet: Yo, insert the hook in the next st to be worked, yo, draw the yarn through the st, yo, draw the yarn through all 3 lps on the hook.
hk
hook
“
inch(es)
incl
include/including
inc
increase/increases/increasing
lp(s)
loop(s)
MC
main color
m
marker
m
meter(s)
mm
millimeter(s)
oz
ounce(s)
patt
pattern(s)
pm
place marker
pc
popcorn stitch
prev
previous
ps/puff
puff stitch
ch-
refers to chain or space previously made; e.g., ch-1 sp
rem
remaining
rep
repeat
rev
reverse
rsc
reverse single crochet (aka the crab stitch)
RS
right side
rnd
round(s)
md(s)
round(s) (a derivative of rnd for rounds. Some fonts show “rn” as an “m”.)
sc2tog
single crochet 2 stitches together: Insert the hook in the next st, yo, draw the yarn through the st (2 lps rem on hook), insert the hook in the next st, yo, draw the yarn through the st (3 lps on hook), yo, draw the yarn through all 3 lps on the hook.
sc
single crochet: Insert the hook in the st, yo, draw the yarn through the st, yo, draw the yarn through 2 lps on the hook.
sk
skip
sm / sl m
slip marker
sl st
slip stitch
sp(s)
space(s)
st(s)
stitch(es)
TBL
through the back loop or turning back loop
TFL
through the front loop or turning the front loop.
tog
together
tr2tog
treble crochet 2 stitches together
tr
treble crochet: Yo twice, insert the hook in the next st to be worked, yo, draw the yarn through st (3 lps on hook), yo, draw through the first 2 lps on the hook, yo, draw through the rem 2 lps on the hook.
The table below encompasses the knitting abbreviations used by the US yarn industry designers and publishers. This is the industry platform or a backbone in a sense. Please use this as a foundation and build upon it.
Abbreviation
Description
alt
alternate
approx
approximately
byo
backward yarn over
beg
beginning
bet
between
BO
bind off
cn
cable needle
CO
cast on
cont
continue
CC
contrasting color
dec
decrease
dpn
double-pointed needles
foll
follow
inc
increase
k
knit
kfb
knit 1 into front and back of a stitch; single knit increase
ksp
knit 1 stitch, slip this stitch from right needle to left needle, pass second stitch on left needle over first stitch and off left needle; return stitch to right needle; single right-leaning decrease
k2tog
knit 2 stitches together; single right-leaning decrease
k1B
knit stitch in row below
kwise
knitwise
LH
left hand
lp
loop
MC
main color
M1lp
make one left purlwise; single left-leaning purl increase
M1L
make one left; single left-leaning knit increase
M1p
make one purlwise; single purl increase
M1rp
make one right purlwise; single right-leaning purl increase
M1R
make one right; single right-leaning knit increase
M1 or M1K
make one stitch knitwise; single knit increase
m
marker
p2sso
pass 2 slipped stitches over
psso
pass slipped stitch over
pat or patt
pattern
pm
place marker
prev
previous
p
purl
pfb
purl 1 into front and back of a stitch; single purl increase
p2tog
purl 2 stitches together; single decrease
pwise
purlwise
rem
remaining
rep
repeat
rev St st
reverse stockinette stitch
RH
right hand
RS
right side
rnd
round
sl
slip
sl1k
slip 1 knitwise
SKP
slip 1 knitwise, knit 1, pass slip stitch over knit stitch; single left-leaning decrease
slip 2 stitches as if to knit 2 together, knit 1, pass 2 slipped stitches over knit stitch; centered double decrease
ssk
slip 2 stitches knitwise, knit these 2 stitches together through back loops; single left-leaning decrease
ssp
slip 2 stitches knitwise, return these 2 stitches to left needle and purl them together through back loopsl; single left-leaning decrease
SSPP2
slip 2 stitches knitwise, return these 2 stitches to left needle and then slip them as if to p2tog through back loops, purl 1, pass 2 slipped stitches over purl stitch; centered double decrease
sssk
slip 3 stitches knitwise, knit these 3 stitches together through back loops; double left-leaning decrease
sssp
slip 3 stitches knitwise, return these 3 stitches to left needle and purl these 3 stitches together through back loops; double leftleaning decrease
Crochet cast on is a very simple way to create a neat and professional border of your work on a flatbed knitting machine. The border looks like a braid rather than a rope. A crochet hook or a latch tool can be used for this cast on, thus the name, crochet cast on.
In this tutorial, you will learn two ways to do a crochet cast on. I am using a crochet hook for this tutorial.
Let’s go!
The Process:
Step 1. Set up your knitting machine.
Prepare the needles: push the needles into the holding position.
As usual, the first step is to engage the working needles. For this exercise, select 30 needles. They become your working needles. Use the blunt edge of the needle pusher to move the working needles into a holding position (all the way forward). (D position on Singer/Studio, E position on Brother/Knitking.)
Blue Cat makes sure that the working needles are in E-position.
Prepare the carriage: place the carriage to one side of the working needles with the holding cam lever in the normal position.
The carriage can be on either side* of the working needles.
* Usually, the carriage is on the right for the right-handed person and on the left for a left-handed person. In this tutorial, the carriage starts on the right.
In this tutorial, you will see two methods of crochet cast on. With the first method, the cast on starts at the opposite side from the carriage. With the second method, the cast on begins on the same side as the carriage. The working yarn, however, always ends up on the side of the carriage.
If the carriage ends up on the wrong side somehow, you can switch the holding cam lever to the holding position and move the carriage to the other side. Another way to do it is by removing the carriage all the way out of the machine and inserting it on the correct side. The nice thing is that you don’t have to remove your stitches from the needles.
Step 2. Crochet cast on: cast the yarn on the needles with a crochet hook or a latch tool.
Method 1.
Begin with a slip knot on the crochet hook.
Let’s begin the cast on. Make a slip knot around the crochet hook (or a latch tool). Insert the hook between the first and second working needles on the opposite side from the carriage, just like in the photo below. Use your right hand to hold the crochet hook and your left hand for the yarn.
With the slip knot on the crochet hook, slide the hook between the first two needles.
Start crochet cast on by making a chain with each stitch wrapped around each needle.
Reposition your left hand so that the working yarn is above the needles and in front of the crochet hook.
Working yarn wraps the first needle running in front of the crochet hook. (My talented assistant is pulling on the knot tail to make this picture clear).
Use the hook to slip the yarn through the slip knot below the needles.
The crochet hook is pulling the yarn down and through the slip knot.The first stitch is created. Now the crochet hook is back between the next set of needles. The working yarn needs to be moved in front of the hook.
Pull the yarn down through the next loop.
The yarn is pulled down through the loop.
Next, move the crochet hook upwards between the adjacent set of two needles.
For the purpose of this picture, I removed the hook from the last loop on the bottom right. You can see here how the yarn runs down through the loop between the needles.
Keep going in the same fashion until you reach one needle before last.
Wrap the yarn around the last needle.
When you reach the last needle, slip the yarn down between the last two hooks and cast the last loop onto the last needle.
The crochet cast on is now on all working needles.
The next picture shows better the last stitch and the yarn behind it.
The last stitch is looped around the last needle with the yarn under and behind it. The carriage is on the right.
Method 2
You will need a crochet hook and a transfer tool.
Make a chain using a crochet hook with the number of stitches equal to the number of working needles.
This fabulous set of crochet hooks is made of Sorbus or mountain ash. Aren’t they beautiful!? They are also very ergonomic and easy on your hands. And they create very uniform stitches.
Crochet hooks.
Make a chain using a crochet hook. Make sure, it is reasonably loose.
The crochet chain looks like a braid on one side.
The crochet chain looks like a braid.
And it looks like a chain on the other side.
Crochet chain.
Place the last stitch onto the last needle with the working yarn on the side of the carriage.
Normally, a cast on starts on the opposite side of the carriage and moves towards it. This cast on is unique with this respect. It starts on the same side as the carriage with the last stitch looped around the last needle. by doing this, the working yarn stays next to the carriage.
The first step is to loop the last stitch onto the last needle with the working yarn behind the stitch. With the carriage on the right side the cast on starts on the right with the last loop of the chain. So, the working yarn is on the right side as well.
Crochet stitch on the last needle.
Move the chain links from right to left onto the needles with a transfer tool.
Next, use a transfer tool to move the chain links onto the needles from right to left
The transfer tool has an eyelet at its end, which will be hooked onto each needle to transfer the stitches (individual loops of the crochet chain).
Below is a close-up photo of the transfer tool threading through the stitch and hooking onto a needle tip.
Transferring the stitches.
Transfer the chain loops one at a time. The braid side of the chain stays out.
Transferring the chain loops one by one.
When all stitches are transferred, you can thread the carriage and start knitting as usual.
The crochet chain is transferred onto the needles of the flat bed knitting machine.
Pros and Cons of Method 2.
This method has its pluses and minuses.
The plus is that if you have a tendency to over-tighten your cast on, this will help you avoid the problem by using a large enough crochet hook to make a chain that is relatively loose.
The negatives are, first, it takes a little longer because you have to prepare the chain separately; and second, it’s easier to make a mistake and skip a needle just like I did. Do you see a skipped needle in the photo above?
Step 3. Thread the yarn through the yarn feeder of the carriage.
Whether you used the first of second method, the crochet cast on is accomplished. Now you can knit your project.
Run the working yarn under the carriage and through the yarn feeder. Close the yarn feeder. The holding cam lever is in the normal position. The needles are in the holding position.
The yarn feeder on the carriage is threaded and closed.
Step 4. Knit the first row by moving the carriage across the needles to the left.
Below is the first row created by moving the carriage to the left.
The first row is knitted by moving the carriage from right to left.
Step 5. Attach the cast-on comb to the work and knit as usual.
The cast-on comb is attached to the first row. This photo came out with high contrast. The comb is on the bottom. It’s white on the left and black metallic on the right.
Knit as usual.
The swatch is ready to be removed from the machine.
Crochet cast-on edge looks like a braid.
I put my swatch onto a hand knitting needle for this demo and blocked the sample with a steam iron to demonstrate the border created by a cast on with a crochet hook. As you can see, this border looks a lot like a braid similar to that of a manual cast on or bind off.
The crochet cast-on border is ready.
I hope, you found this tutorial helpful.
Blue Cat is really tired after all this work. Whew!
In some cases, a regular e-wrap cast on can be difficult to handle on a flatbed knitting machine. A very large knitting project, for example, may consist of a long chain of e-loops. Attaching a long cast-on comb and the weights to a long row can be challenging when you have one or two very long rows to work with. To ease this task, a provisional anchor fabric comes to the rescue.
An anchor is a temporary piece of fabric made of waste yarn with the cast-on comb and the weights already attached to it. Affixing an e-wrap cast on to a temporary anchor gives you better control when starting a new knitting project. By doing this, you create a smooth transition from a temporary anchor fabric to the working yarn. This setup makes it easier for the carriage to perform its task, helps avoid potential flaws, and gives a uniform and professional look to the finished edge.
Let’s get started!
The Process:
Flatbed Knitting Machine Tutorial with Blue Cat
Step 1. Prepare a temporary anchor swatch with open cast on.
Let’s create a provisional anchor piece using some waste yarn from the stash. As mentioned before, an anchor is a knitted segment long enough to attach a cast on comb and the weights. It is used to pull the actual knitting down and make it easier for the machine to operate.
Set up the working needles and the carriage for an open cast on.
With the carriage on the right, push the needles into the working position (B).
To get started, let’s prepare the needles and the carriage for an open cast on. First, push about 30 needles into the working (B) position. Start with an empty carriage on the right* of the working needles.
* Starting with the carriage on the right side is easier for a right-handed person. If you are left-handed, you can place the carriage on the left and work in the direction opposite of what’s described in this tutorial. Or, you can follow the instructions and change the directions later.
Working needles are in the working position (position B).
Move the alternating needles to a non-working position (A).
Next, use the 1/1 needle pusher to move the alternating needles back to the non-working position (position A).
The alternate needles are in the non-working position (position A).
Set the holding cam lever in the normal position.
Now, let’s prepare the carriage. Make sure, the holding cam lever on the carriage is in the normal position (N for Brother/Knitking and a triangle for Singer/Studio machines.)
Marked with the blue ellipse, the holding cam lever is in N-Position (normal on Knitking machine).
Thread the yarn feeder and the carriage with waste yarn.
With the carriage on the right side of the working needles, thread the waste yarn through the carriage and lock the yarn by moving the yarn feeder lever to the right.
The waste yarn is threaded through the carriage with the yarn feeder lever locked.
Knit the anchor swatch.
Move the carriage to the left for an open cast on.
Now, the needles and the carriage are ready for an open cast on. To create an open cast on, move the carriage from right to left across the working needles. You can find the detailed description in Blue Cat Tutorial for an open cast on.
The first run of the carriage across the working needles creates an open cast on.
Place all needles in the working position (B).
Before you start knitting, push the needles that were in the non-working position (A) back to the working position (B). Use the blunt edge of the needle pusher on the needle butts.
All working needles are in the working position.
Attach cast-on comb to the loops, add claw weights if necessary.
At this point, we attach the cast-on comb to the loops while keeping the working yarn free (in front of the cast-on comb).
Attach the cast-on comb to the loops to create tension. The working yarn (tail on the left) is free. The carriage is on the left side (in the direction of the working yarn).
Knit several rows to make a provisional anchor.
Finally, we can knit several rows to produce the temporary piece of fabric. With the weights attached, this helper fabric works as an anchor for our future knitted creation.
Knit a few rows to create anchor fabric. Keep the cast-on comb and the claw weights attached.
Side Note: I realized that I used the photos from the Open Cast On tutorial using blue yarn. My anchor is actually made of brown yarn in this tutorial. And the blue yarn will be the permanent piece from this point. I will update the photos to avoid confusion in the future.
Disconnect the working yarn from the carriage.
First, you need to disconnect the working end of the waste yarn from the carriage and make sure that it hangs freely. You can attach the yarn to your claw weight to keep it from catching by the carriage.
Step 2. Attach the ravel cord
Remove the waste yarn from the yarn feeder and replace it with a ravel cord.
A ravel cord is a thin, sleek, and durable cable used to affix the permanent work to a temporary anchor. Nylon, silk, or linen can be used for this purpose. Thin mercerized cotton cord worked very well for this project.
Thread the ravel cord through the yarn feeder of the carriage.
Insert the ravel cord into the yarn feeder and lock it.
Knit one row.
Move the carriage from right to left to knit one row with the ravel cord. Only one row is necessary. The ravel cord holds the permanent work to the temporary anchor. The ravel cord will be pulled out later to disconnect the anchor.
Knit one row with the ravel cord.
Disconnect the ravel cord from the carriage.
After one pass, remove the ravel cord from the carriage.
Step 3. E-Wrap Cast On
Set up the working needles and the carriage for the permanent work piece.
Switch the cam lever to the holding position to move the empty carriage from left to right.
At this point, the empty carriage is on the left side of the working needles. You need to move the carriage to the right in preparation for the e-wrap. To do that, switch the cam lever to the holding position and move the needles into their holding position (E on Brother/Knitking, D on Singer/Studio) as shown in the photos below.
Switch holding cam lever to holing position to allow a free carriage pass.Move the needles in the holding position.
Move the carriage from left to right.
Switch the cam lever on the carriage to the normal position.
And now, switch the cam lever back to the normal position. Please see photo below.
Switch the holding cam lever in working (normal) position.
E-wrap the working needles from left to right. Both the ravel cord and the e-wrapped working yarn are on the needles.
Keep the needles in the holding position. It makes it easier to e-wrap the working yarn. In addition, it is easier for the carriage to perform its task at the first raw with the needles in the holding position.
With the carriage on the right, e-wrap your working yarn starting on the left and ending on the right side next to the carriage.
Thread the working yarn through the yarn feeder.
Feed the working yarn into the yarn feeder of the carriage. When you e-wrap the yarn onto the needles, your ravel cord is still on the needles as well. So, you have two layers of loops on your working needles.
E-wrap cast on in front. The ravel cord loops are by the guard pegs.
Knit the work piece. The working fabric is attached to the anchor fabric by the ravel cord. The anchor fabric stabilizes the work.
Now, you can move the carriage from right to left to knit the first row of the actual work. Because the work is already attached to the anchor piece with tension applied to it by the cast-on comb and the weights, the passage by the carriage is very smooth and easy. You can continue knitting your workpiece until it’s done.
The photo below shows the brown anchor piece with a cast-on comb attached and the actual work in blue yarn. The white ravel cord connecting the two is not seen very well, but it’s there.
The blue fabric is the actual work.
For the purpose of this tutorial, I removed the work from the machine and bound it off by hand. I blocked the fabric to keep it from curling. You can easily see the anchor fabric on the bottom, the white ravel cord in the middle, and the actual work fabric in blue.
The prop fabric (brown) was used to support the weights. The ravel cord (white) connects the work fabric (blue) to the supporting anchor fabric.
Side Note:
For some reason, these colors and textures made me think of a corn field with the blue sky in the background.
Hm 🙂
Remove the ravel cord to disconnect the permanent part from the anchor.
The ravel cord can be pulled or cut to free your work.
Cut the or pull the ravel cord to separate the anchor fabric from the main work.
In the photo below, you can compare the cast-off (top) done by hand with the e-wrap cast on (bottom). The manual cast-off looks like a braid while the e-wrap cast on looks like a rope. Both look very nice.
E-wrap edge is on the bottom. See how sharp and crisp it is compared to the bind off on the top.
Below is another view of the e-wrap cast on.
E-wrap cast on with an anchor.
This is the end of our tutorial for e-wrap cast on with an anchor on a flatbed knitting machine.
In machine knitting, e-wrap cast on (aka e-loop) is a type of cast on in which yarn is wrapped around each needle counterclockwise forming loops that are shaped like a lower-case cursive letter “e”.
Unlike open cast on, it gives a secured finished edge to your knitting. E-wrap cast on stands on its own and it gives a neat border to the garment. How to cast on a finished edge using the e-wrap method on a flatbed knitting machine?
Follow this tutorial for step-by-step instructions with photos. Or, see the outline above for a quick review.
Let’s get started by setting up the knitting machine.
The Process:
Step 1. Prepare knitting machine settings for e-wrap cast on.
Before we begin the e-wrap cast on, we need to make sure the knitting machine settings are correct.
Set the working needles to the holding position.
Push the working needles into the holding position (HP). (D-position on Knitmaster, Empisal, Silver, Singer, and Studio; and E-position on Knitking and the modern Brother.) These needles, however, should be engaged in knitting, and not just holding. To accomplish that, make sure the carriage settings are correct.
Blue Cat pushed the working needles all the way out to the holding position.
Set the cam lever on the carriage to the normal position.
Switch the holding cam lever to the normal position to ensure that the machine operates the needles as working and not holding needles. (The cam lever setting is N in Brother/Knitking, triangle in Singer/Studio machines).
Marked with the blue ellipse, the holding cam lever is in N-Position (normal on Knitking machine).Holding cam lever in N-position.
Side note: If you set the lever to the holding position and push out the needles to the holding position, and then move the carriage across the needles (in either direction), the machine will not move these needles back to the working position (B-position).
You can test your machine for the correct settings. Push a few needles all the way out to the holding position. Then change the lever, and move the carriage from side to side across the needles. If the needles will stay in the same holding position, the cam lever is not set correctly. If the needles move to a working position, it means that the carriage is set to a working position. You need the working setting.
Blue Cat checks the setting.
Place the carriage on the opposite side from the starting needle of the e-wrap. The right side is most commonly used.
The carriage can be on either side of the needles. But it should be on the opposite side from the starting needle.
E-wrap begins with the needle furthest from the carriage and moves towards the carriage. If the carriage is on the right, the e-wrap begins on the left and ends on the right. This is easier for a right-handed person. If you place the carriage to the left of the needles, you need to e-wrap the needles from right to left with the working thread facing the carriage.
For the sake of this exercise, park the carriage on the right of the needles.
The carriage is on the right of the needles.
Run a test pass.
Pass the carriage from right to left to make sure the working needles move from the holding to the working position.
Test pass of the carriage from right to left. The carriage moves the needles to the working position.
Now, repeat the test from left to right. Push the needles back to the holding position and run the carriage to the right (back to its original place). The test run should set the needles from the holding to the working position again.
The needles are set in the holding position (all the way out) again to repeat the test in the opposite direction.Test run has set the needles back to the working position.
Now, that the machine is set, we can start e-wrapping the needles.
Step 2. E-wrap the working needles starting with a slip knot on the furthest needle from the carriage
Begin with a slip knot the size of an individual loop.
The first loop is a slip knot starting on the left when the carriage is to the right of the working needles.
The yarn is wrapped counterclockwise around the next needle to the right, forming a small cursive letter “e”.The yarn is wrapped counterclockwise around the next needle to the right, forming a small cursive letter “e”.Continue wrapping each needle keeping the tension low and even.All working needles are e-wrapped in this photo.
The tension of the e-loops should be not too tight, but not too loose either. If it’s too tight, the machine may have difficulty knitting these loops. If the tension is too loose, the edge of your work will look uneven and messy. It may take some practice to achieve the right tension.
To avoid too much tension of the working yarn when you are making the loops, you can slip the yarn through the clip of the tension unit as shown in the photo below.
I pinched the yarn in the clip to keep it loose.Blue Cat check: All working needles are e-wrapped from left to right with relatively loose and equal tension. The needles are in the holding position. The loops are pushed all the way back. The carriage is on the right.The e-loops are pushed all the way back on the working needles.
Step 3. Thread the carriage with the working yarn.
The next step is to take the working yarn and thread it through the carriage as shown in the photos below.
The working yarn is threaded through the carriage. It is still loose in this photo.Weeee! Blue Cat is demonstrating how the working yarn is threaded.
Step 4. Move the carriage from right to left.
The carriage is on the move from right to left.The first row is made. The purl side of the work is facing you.
Step 5. Attach the cast-on comb and the weights to the first row of stitches.
At this point, you can attach the cast-on comb and weights to the newly-made stitches. But, you may find it a little difficult to do so because there isn’t enough length of the knitted fabric. To make it easier, you can run the carriage from left to right to gain more length.
To make sure that the machine knits properly without the weights, it’s best to push the working needles all the way out to the holding position again. The stitches (loops) should be pushed all the way back.
I push a few needles at a time while using my left hand to keep the stitches in the back.All working needles are out in the holding position now with all stitches in the back as far as they can go.
Move the carriage across the working needles once or twice more. When the fabric is long enough, you can attach the cast-on comb and the weights.
The cast-on combs and the weights are attached.
Step 6. Knit your project.
You can knit your project now.
The photo below shows the e-wrap border. It’s the top border of this small knitting project. When you knit on the machine, the e-wrap border is at the bottom of your work. I turned it upside-down for a better view. The opposite edge has free loops.
The top border is made using the e-wrap method.Blue Cat check
Open cast on is the type of cast on that produces unfastened stitches that will unravel whenever possible. This type of stitch is also known as live or open stitch. Open cast on is also known as provisional or invisible cast on.
The Uses of an Open Cast On.
So, open, invisible, or provisional cast on creates live or open stitches. This cast on has many uses.
What is the purpose of an open cast on?
It provides an invisible seam
After you are done knitting one part of your project with an open cast on, you then bind it off. Next, you can load the live stitches back onto the machine with the knitting turned upside-down. The intent is to start knitting in the opposite direction. Thus, you create an invisible seam with an intriguing pattern radiating in two directions.
By doing that, you can knit a scarf in two directions starting from the middle. Or, you can make anything that folds. For example, a stocking cap or socks, a bag or purse, toys, a double-knit fabric, and so on.
You can also use these open stitches to hem a garment using a ribbing machine or by hand.
It allows making a disposable anchor
An anchor is a piece of provisional fabric knitted from waste yarn. And it is used to attach permanent yarn. Later, the anchor is removed to give a very neat and professional appeal to the remaining edge.
It saves time for making a temporary sample swatch
One example is making a new pattern and needing to calculate the number of stitches and rows for the size. Another example is when you are unsure if you have enough yarn for a project. In both cases, you can quickly load the needles with an open cast on. Then, knit a sample swatch and cast it off. After you block it you can measure the resulting piece.
These are just a few applications of the provisional cast on. I am sure, you can come up with many other creative uses!
So, how do you do an open cast on? Let’s get started.
The Process:
This tutorial explains step by step how to do an open cast on. Use the outline above if you know how to do it and only need to review the method. It recaps every step of the process. You can click on each step to see the detailed explanation and photos.
Do you want to see the entire process? Then, read on!
Step 1. Prepare the tension unit.
Thread the yarn through the tension unit.
Thread the yarn according to your machine user manual. The diagram below demonstrates the steps for my Knitking machine. Knitking is very similar to Brother.
Thread the yarn through the rear yarn guide.
Pass it between the disks from the back.
Thread through the front yarn guide.
Thread into the take-up spring eyelet.
Clip it in the yarn clip.
Diagram for threading yarn on Knitking machine
Adjust tension for yarn thickness.
Usually, the tension is higher for thick yarn and lower for fine yarn. The medium-weight yarn tension is somewhere in the middle. Adjust the yarn tension. Please refer to your machine manual for guidance.
The yarn tension unit is loaded. And the tension is set. Doesn’t it look elegant?
Upon setting the tension, you need to prepare the needles for an open cast on.
Step 2. Prepare the needles for an open cast on.
A Technical Note about Needles and their Positions (for Beginners).
The Needles . . .
A knitting machine needle has five parts: hook, latch, stem, butt, and shank (please see the diagram below).
Knitting machine needle diagram.
The folded knobs you see closer to the middle of the photo below are the butts. You will be using them to push the needles into their positions. It will become more clear very soon.
The needle butts are used for repositioning the needles.
. . . and the needle positions
Modern knitting machines have four positions:
Non-working position (NWP) does not knit.
Working position (WP) knits stocking stitch.
Upper working position (UWP) is used for patterns.
Holding position (HP) does not knit when the holding lever is on.
Different models used different letter denominations for the positions.
Knitmaster, Empisal, Silver, Singer, and Studio, use A, B, C, D, respectively.
Brother (KH830 and higher) and Knitking use A, B, D, and E, respectively.
Only two positions are used for an open cast on — working and non-working positions.
Move selected needles to the working position (B) and align them using the carriage.
Chose approximately 30 needles to use for knitting your practice swatch. They are referred to as working needles. Use the flat side of the needle pusher and the needle butts to move them one step forward into the working position.
The holding cam lever on the carriage is in the normal position (N on Brother/Knitking or triangle on Singer/Studio).
Marked with a blue ellipse, the holding cam lever is in the normal position.Close-up of the holding cam lever in normal position (N).
Next, run the carriage across the needles a couple of times to align them. The position of the carriage relative to the needles is not important at this point. It can be on the right or left side of the working needles.
The needles are aligned in the working position with the K-carriage on the left.
Move the alternating needles back to the non-working position with a 1/1 needle pusher.
The next step is to move every other needle back to the non-working position (A).
A 1/1 needle pusher is used to push every other needle back into the working position.
Blue Cat is holding the needle pusher to demonstrate how it moves the needles.
Blue Cat is helping move the alternating needles back to non-working position.
The picture below shows the selected needles alternating between the working (B) and non-working (A) positions.
Position A is a holding place for the needles. Needles in this position (in the back) will not be involved in the knitting process. B-position is the working position (in front).
Align the needles by moving the carriage with the holding cam lever in the normal position. Leave the carriage on the right.
At this point, the needles are in place and the holding cam lever stays in the normal position. The next step is to move the carriage across the needles a few times. This time, you need to park the carriage on the right of the working needles.
Step 3. Prepare the carriage for the open cast on.
The carriage and the needles are in position for the cast on. The cam lever is in the normal position. The final step is to thread the carriage.
Thread the yarn through yarn feeder A of the carriage
Now you will need to thread the yarn through the carriage. It is the carriage used for a stocking stitch.
How to thread the yarn through the feeder of the carriage (for Beginners).
Open the yarn feeder of the carriage by pushing the lever to the left.
Remove the yarn from the yarn clip on the tension unit.
Take the yarn through the yarn feeder A of the carriage.
Move the lever back to close the yarn feeder while holding the yarn in the left hand.
Voila! You are ready! But don’t let go of the yarn just yet!
Carriage is prepared for knitting.
Step 4. Cast the yarn on the needles using an open cast on.
Move the carriage from right to left until you hear a click.
Still holding the yarn with your left hand, move the carriage from right to left across all working needles. You can let go of the yarn when you feel the needles catch it.
After the carriage has been moved to the left, the needles in the working position should have the yarn wrapped around them as shown in the photo below.
The yarn is hooked on the needles in a working position (B). The alternating needles are still in the non-working position (A).
This is what it looks like from a different angle:
Step 5. Prepare needles for knitting.
Attach a cast-on comb to the loops.
Now, we use a cast-on comb to add tension to the loops.
Blue Cat introducing the cast-on comb.
I chose the short cast-on comb for this small exercise.
I am using a short cast-on comb for this small project.
Hook the cast-on comb over the loops and pull it down lightly.
Cast-on comb is attached to the loops.
Make sure that the working yarn connected to the carriage (on the left) is not attached to the cast-on comb.
The working yarn on the left is free.
You should be able to pull the working yarn toward you as shown in the photo below.
The working yarn can be pulled forward easily.
Push the remaining needles from the non-working to the working position.
There is one more step to take before the machine is prepared for knitting. Now, we need to use the flat side of the needle pusher to return the needles from position A back to position B.
All working needles are in working position now (position B). You are ready to move the carriage from left to right.
Step 6. Move the carriage from left to right and continue knitting.
Move the carriage to the right clearing the knitting before you move it back in the other direction. You will hear a clicking sound at the end of each row.
The first row is made with the carriage on the right side.
Now, we are ready to knit our project. Move the carriage back and forth making sure that the carriage clears the rows. But don’t move the carriage too far passed the knitting.
Step 7. Remove the knitting while holding the cast-on comb.
After a few rows are knitted, you will see the purl side of the project facing you. You can remove your knitting when you are satisfied with the number of rows you’ve made. This is called cast-off.
To cast off, remove the yarn from the yarn feeder A of the carriage. Push the yarn feeder lever to the left and move the yarn downward. And finally, move the empty carriage over the work to the other side.* When you do that, your knitting piece will disconnect from the needles.
*Important: To prevent your knitting from falling, make sure that you hold the cast-on comb as you move the carriage.
The carriage is empty. You can remove your work from the machine.The working yarn is not in the carriage. The empty carriage is ready to move to the left and disconnect the practice swatch.
Congratulations! You have completed the Open Cast On Tutorial!
Soothes problematic skin (?), great for shampoo bars.
10%
Avocado Oil
Soft bar. Medium lather. Mild cleansing.
Recommended for dry and sensitive skin. High in vitamin E.
15-20%
Babassu oil
Hard bar. Large bubbles. High cleansing.
Milder than coconut oil.
15-30%
Canola Oil
Moderately hard bar with creamy stable lather similar to olive oil. Can be prone to rancidity & DOS due to high linoleic/linolenic acids.
Moisturizing, conditioning, and skin-softening benefits.
15-40%
High-oleic canola is more stable. Chelating agents help. Budget-friendly alternative to olive oil.
Castor Oil
Soft bar. Stable lather. High cleansing.
Drying if used in high amounts.
10% (higher amounts in shampoo bars)
Chicken Fat
Hard, long-lasting bar with creamy lather. High in unsaturated fats (like oleic acid) that can make the soap softer, prone to rancidity and DOS.
Cleansing and moisturizing.
10-15%
Blend with beef tallow, lard, coconut oil, or olive oil for a balanced bar.
Cocoa Butter
Hard-to-brittle bar. Creamy lather. Long lasting bar. Strong scent.
15% (can use more, but may cause cracking)
Coconut Oil
Hard bar. Abundant lather. Large bubbles. High cleansing.
Saponified coconut oil is drying. Unsaponified coconut oil softens the skin. Experiment with a 100% coconut oil soap with a 20% superfat. Add after saponification in hot process.
30% (higher than that can be drying, so be sure to superfat)
Grapeseed Oil
Soft bar. Medium lather. Mild cleansing. Shorter shelf life.
Recommended for acne soaps.
8-12%
Hazelnut oil
Soft bar. Medium lather. Mild cleansing.
5-8%
Hemp (Seed) Oil
Soft bar. Medium silky lather. Mild cleansing
Emollient properties. Keep oil refrigerated.
15%
Jojoba Oil
Stabilizes and suspends lather if used in small amounts; it can kill lather when used in high amounts. Extends shelf life of soap.
Conditions skin & hair, excellent for shampoo bars.
5-10%
Tallow (Deer)
Hard bar. Mild stabilizing creamy lather. White.
Rich in palmitate. In modern times, tallow became replaced with palm oil.
25-50%
Lard
Hard bar. Mild stabilizing creamy lather. White.
100% lard soap with no superfat makes great laundry soap.
25-50%
Mango Butter
Emollient properties.
5-10%
Meadowfoam Oil
Creamy leather. Increases shelf life of soap.
Conditions skin.
10%
Neem Oil
Strong scent.
Skin healing (?). Antiseptic, repels fleas and ticks – good for pet soaps and traveler soaps.
5-10%
Olive Oil
Starts out soft, but cures hard. Creamy lather. Small bubbles.
The low cleansing properties of olive oil make it very mild. Soap for sensitive skin, elder skin or baby skin should include high amounts of olive (60%). Castile soap is made with 100% olive oil.
100%
Palm Kernel Oil
Hard bar. Large bubbles. White.
Similar to coconut oil, but less drying.
15-30%
Palm Oil
Hard, long lasting. Mild stable lather.
Used instead of lard or tallow.
25-50%
Peach Kernel Oil
Excellent for skin (?).
15%
Rice Bran Oil
Soft bar, medium lather, mild cleansing. Gives soap a sheen making it look less dull.
Similar to olive oil.
5-12%
Safflower oil
Soft bar, medium lather, mild cleansing.
Similar to olive oil (?).
5-12%
Shea Butter
Medium hard long-lasting bar. Mild creamy lather.
Emollient properties.
15%
Shea butter
Medium hard long-lasting bar. Mild creamy lather.
Similar to cocoa butter
5-20%
Soybean oil
Soft bar, medium lather, mild cleansing.
Similar to olive oil (?).
5-12%
Sunflower Oil
Soft bar with silky lather, mild cleansing. Slows down time to reach trace.
Homemade 1-2-3 Lotion is Gentle and Nourishing, Easy to Make, and Loved by the Entire Family
Do you use lotion on your face, hands, or body? I rely on hand lotion several times a day. Every time my hands come in contact with soap and water, I reach for it. And that’s often! Between working on my hobby farm, gardening, playing with my pets, washing wool fleeces, and handling all sorts of materials, my hands are constantly exposed. This homemade 1-2-3 lotion is a real life saver!
Working with wool, in particular, can be tough on the skin since wool naturally absorbs oils. As I work with it daily, my hands need extra care. So, lotion is a must for me.
If I expose myself to commercial lotions and cremes in such amounts every day, I would be absorbing so many carcinogens, irritants, endocrine disruptors, toxicants, allergens, etc. Additionally, all this chemistry washed down the drain would eventually accumulate enough to disturb the ecosystem.
As Easy as 1-2-3
So, my approach to skin care is very straightforward. My lotion must have moisturizing and emollient properties, and must be slightly acidic. Such modest requirement can be achieved with three simple ingredients. Water (moisturizer), oil (emollient), and wax (surfactant – the agent that homogenizes oil and water). The key to this recipe is in the proportion of these ingredients. Too much oil will leave oil residue on the skin. Too much water will cause the lotion to separate and form water puddles on the surface (that part is easy to fix, just drain away the excess water).
My mnemonic for this magic formula is very simple: remember the magic of 3. The recipe consists of 3 basic ingredients. You will need 3 quarters of a cup of each main ingredient (oil and water). And you will need 30 grams (1 ounce+) of the “supporting” ingredient (scientifically called excipient) – the beeswax.
The simple Homemade 1-2-3 Lotion recipe
3/4 cup oil (coconut oil, olive oil, or avocado oil work very well);
30 grams beeswax;
3/4 cup water (rose water, herbal or green tea are optional).
Notes:
You can use one oil or any combination of oils as long as the total amount is ¾ cup.
Add 2-3 tablespoons of glycerin to enhance moisturizing quality.
Your favorite essential oil can be added as an option. It should be added as the very last step in the making process.
Add 2 tablespoons of nano-zinc oxide for sunscreen lotion.
Citric acid or fresh lemon juice can be added to the mixture to lower the pH and work as a preservative. The normal pH of our skin is slightly acidic (low).
Vitamin E can be added as a preservative.
Directions
The magic 3 likes this recipe. The process also consists of three steps: 1) weigh the ingredients; 2) melt oils and beeswax in a double boiler; and 3) homogenize with an immersion blender. That’s it. Let’s make 1-2-3 Lotion.
Step 1
Weigh beeswax and place it into a vessel for double boiler. The mild honey fragrance of beeswax will give your lotion a hint of honey smell. Yam!
I cut slivers from a beeswax brick purchased from an apiary. This beeswax smells like honey.
If you use coconut oil, it helps to pre-melt it on a low power in the microwave. Add 3/4 cup of oil in your double boiler.
I added 3/4 cup of melted coconut oil into the glass measuring cup.
Step 2
Place the cup containing the wax and oil into a double boiler and keep until all wax is melted.
I used a veggie steamer this time, which I filled with water above the steaming tray to keep the cup immersed above the oil level.
Keep in the double boiler until the beeswax is completely melted.
The beeswax and oil mixture looks very yellow because of the wax floating on top.
If you look at the mixture from the side, you’ll see that the layers are still separated.
The beeswax is floating on top of the oil.
In the next step, add 3/4 cup of boiling water into the mixing cup.
The oil, beeswax, and hot water are in the cup ready for mixing.
Some people boil a separate pot of water for this purpose. I simply dip three quoter measuring cups into the water used in the double boiler. My double boiler war perfectly clean to begin with. The mixing cup was clean inside and out. The water is perfectly fine for the lotion. Besides, it has been boiling for a long time — it does not have anything living in it.
Step 3
The final step in making 1-2-3 Lotion is to blend the mixture with the immersion blender.
I wait for the mixture to cool a little and start blending when the temperature becomes tolerable to the skin.
When using the immersion blender, make sure the mixture is not too hot to avoid burns.
Move the blender up and down to introduce some air into the mixture. It’s ok to pull the blender all the way out and let the air get trapped in the dome. Keep in mind that for the beeswax (surfactant) to work and homogenize the oil and water mixture, it needs air bubbles.
Blend for 3 minutes at a time and let the mixture rest and cool for about 15 minutes. Come back to it every 15 minutes and blend for 3 minutes at a time. You will start noticing that the mixture is becoming more and more white. It may never be completely white if you are using dark oils like olive oil, for instance.
Continue in this fashion until the lotion reaches room temperature and looks completely homogenized.
Your lotion should be thick and completely homogenized.
At this time, you can add other ingredients as described in the Notes above. It is not very important when in the making process you introduce any of your additives listed in the Notes. But it is imperative that your essential oil be added at a lower temperature. Otherwise, the fragrance of the oil can evaporate, and the lotion will not have your favorite fragrance.
The natural additives will make your 1-2-3 Lotion even better.
That’s it, your 1-2-3 Lotion is ready to go into jars. Keep it in the refrigerator for longer storage. Make sure your kids don’t get a hold of it. It looks like a desert and, sometimes, it smells like one.
Homemade 1-2-3 Lotion in the jars.
Sometimes, I place a large jar of lotion in the fridge (my stash :)) and a small jar on my nightstand or vanity for use.
If your homemade 1-2-3 lotion is used and kept at a room temperature it should not separate. But separation may happen if you keep it in a console of your car in the heat, for example. Simply reheat your separated lotion and re-mix with the immersion blender. The cooler the temperature, the less likely for your lotion to separate.
Try it. It’s as simple as 1-2-3 and very good for your skin.