Category: Project Showcase

  • Blue-and-White Romney Wool Rugged Mittens

    This project was my first complete project back in the early days that I did almost from scratch. It included the spinning all by myself (the very first yarn I spun since my training at The Woolery a few months prior) and knitting with my homespun yarn. This was my first real spinning project – not my first knitting project, though. As a kid, I learned to knit from my grandmother and from my neighbor. I leaned how to crochet from my mom. I was seven when I started and I haven’t stopped ever since.

    As a knitter, I always wanted to have a full control of the type of yarn I am using for my projects. Naturally, it’s very difficult to find the exact composition of natural fibers in my yarn, yarn thickness, type of yarn, color, price, and many other factors that affect the final article I am making. Having said that, spinning my own yarn had always been my secret dream.

    That year, my dream came to fruition. The way it started, was quite shocking for us. It all started with our shed fire on the New Year’s night in January 2018. A lot of expensive farm equipment, animal feed, tools, etc. were lost in that fire. It was a devastating experience for my family. With time, we had to move on and continue living as normally as possible. We cleared our yard from the fire remnants and recovered from the effects of that horrible disaster. As a part of the recovery, we decided to make a purchase for each of us – something that would make us happy. I chose to buy a spinning wheel.

    Elizabeth 2 by Ashford arrived at my door in January 2018. Although elegant and beautiful construction, the wheel look extremely intimidating to me. I had no idea how to start learning. I searched for YouTube videos and spinning classes in my area. To my great surprise, the famous Woolery is within a mere forty-minute drive from my house! We lived in the country, and the closest grocery store was farther away than The Woolery. I took the beginner class at The Woolery and I am so glad I did! Nancy, the instructor, has a specific teaching method that really helped me master the entire spinning process very quickly.

    My choices and possibilities have multiplied infinitely with the new skill of preparing fleece and spinning wool into yarn. Since I learned how to spin, I made a commitment to spin almost every day and definitely every week. Subsequently, I have spun many hundreds of yards of fiber (may be even miles, I am not sure). And I made many articles of clothing with my hand spun yarn.

    This little project was my very first piece of work that started from spinning my own yarn and finished as a final article of clothing.

    Romney wool is one of the easiest types to spin for beginners. These rovings of white and blue Romney fleece were purchased at the local yarn shop.

    The transformation of wool from fleece to the final article had began.

    Romney wool rovings.
    Romney wool rovings.

    I ended up using my second spinning wheel, Kromsky Symphony with a double treadle for this project. And I am glad I did. The double treadle gave a good control of the drive wheel and made my first big project very easy to accomplish as a beginner.

    I enjoyed my first independent spinning project enormously.
    I enjoyed my first independent spinning project enormously.

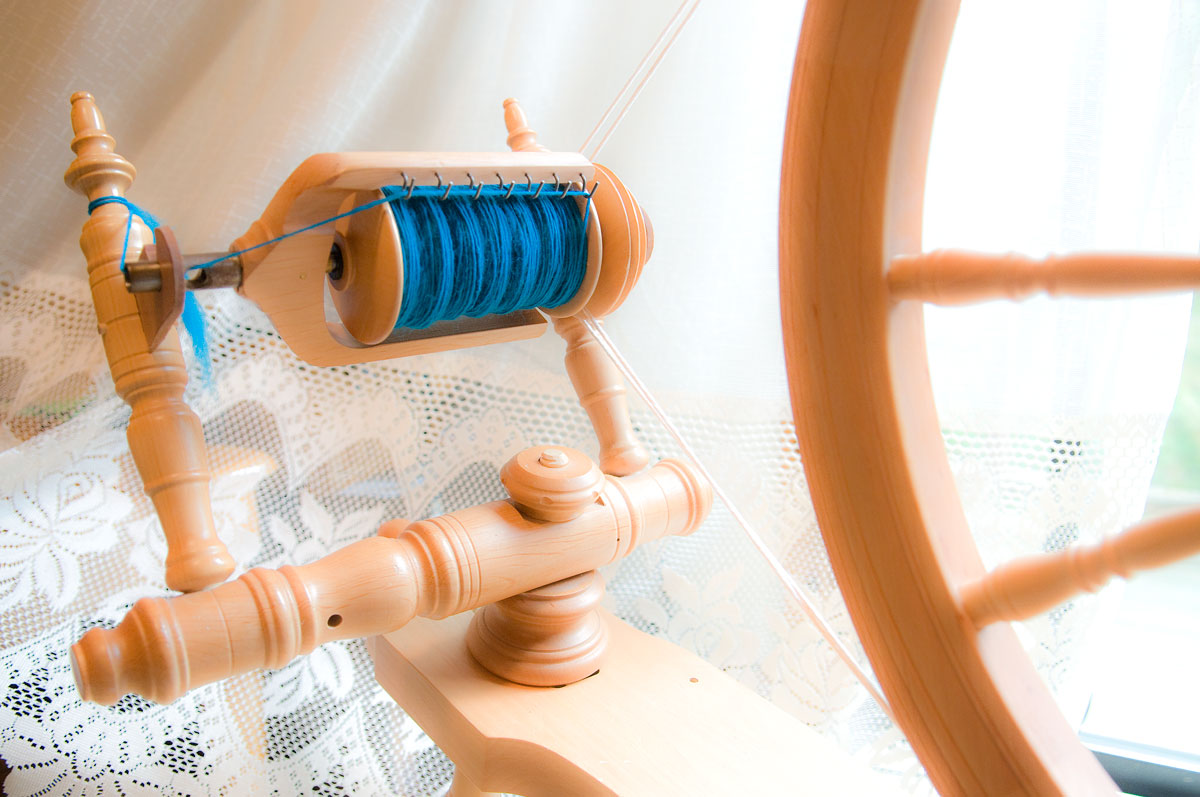
    I spun two bobbins of white and blue single (not plied) yarns paying very close attention to the thickness of my fibers. Nevertheless, I made a typical beginner’s mistake – I overspun my yarn.

    My yarn is “over-twisted.” This is a typical mistake a novice makes. The forgiving long wool Romney fleece still feels very plush.
    My yarn is “over-twisted.” This is a typical mistake a novice makes. The forgiving long wool Romney fleece still feels very plush.

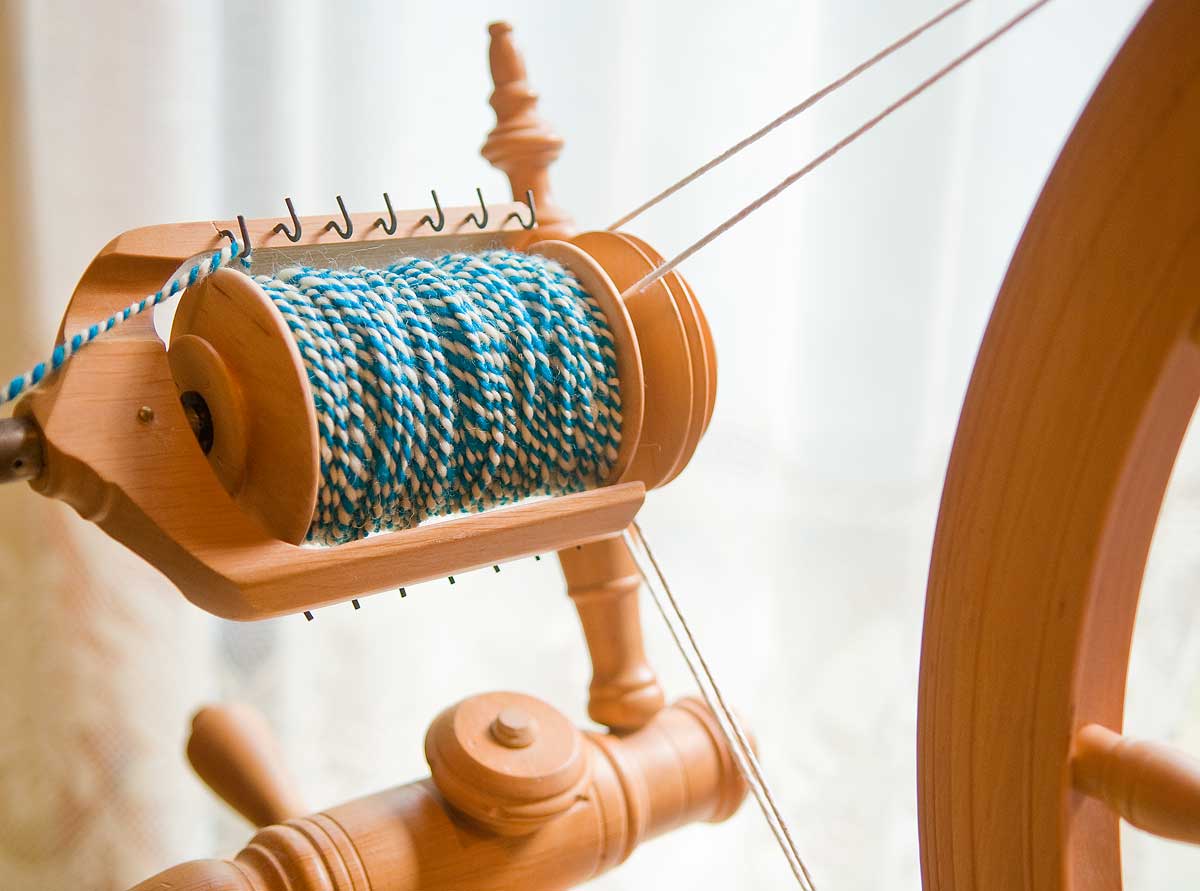
    This mistake gets corrected to some degree during plying when the yarn unwinds a little. This is because when we ply yarns, the plying direction is opposite to spinning direction. For example, spinning occurs clockwise direction forming a z-twist. While plying happens in counterclockwise direction resulting in an s-twist. You can easily see the s-twist in the pictures below because it has contrasting fibers.

    Freshly spun yarn should not be plied the same day. The yarn rests on the bobbins for 24 hours to set the spinning tension.

    After the waiting period I made a two-ply yarn.

    Below is a picture of my very first plying project. I was happy with the result because the final yarn tension was lessened by the plying. And my overspun strands were compensated.

    Two-ply worsted weight Romney wool yarn for the mittens.
    Two-ply worsted weight Romney wool yarn for the mittens.

    After plying, my yarn became much more relaxed. But, it’s not ready for knitting yet.

    The next step was to remove the yarn from the bobbin and wind it into a skein in preparation for washing. A wool tool called niddy-noddy is used for that purpose.

    Two-ply yarn on a niddy-noddy.
    Two-ply yarn on a niddy-noddy. You can see the imperfections. It’s thick in some places and thinner in others. This is my first project after all.

    The next step is to wash and dry the yarn. I slipped the skeins off the niddy-noddy and washed them in hot soapy water. Washing of the wool is very different from regular laundry. Wool is placed in hot soapy water to rest there for 15-20 minutes. Wool is then removed and gently squeezed of water. No agitation in the wash and no wringing is allowed. Otherwise, the wool will felt.

    After the wash, I rinsed the wool in hot water a few times. I use a small amount of vinegar in the last rinse to remove any residual alkali soap and to condition the wool. I used my drying rack to hang the washed skeins to air dry. Sometimes, I use weights for the drying process. But I didn’t use any weights that time. I let the wool dry naturally. To my surprise, the yarn became very relaxed and not over-twisted at all after washing and air-drying.

    Spun yarn on drying on the rack.

    My next step was to wind the wool into balls. A couple of wool contraptions are used for this. The swift stretches out like an umbrella to hold the skein around its “waste.” And the yarn ball winder creates nicely wound balls of wool.

    I could’ve used my sturdy sewing desk for this purpose. But I actually preferred to use my second floor railings for this job. The umbrella swift opens very widely, and I sure don’t want it to catch on anything or anybody while I wind the yarn.

    Swift (left) and a ball winder (right)
    Using a swift (left) and a ball winder (right) to transform the skeins into balls of yarn.

    The amount of fleece rovings in the basket above produced these three balls of tightly spun and rather thick yarn.

    Balls of white-and-blue two-ply yarn ready for knitting.
    Balls of white-and-blue two-ply yarn ready for knitting.

    Since this project I spun miles of yarn. Every new project hones the skill. But, I think, this wasn’t too bad for a newbie.

    I used long wool for my first spinning project. This type of wool is easy to spin, but the resulting yarn is coarse. Long wool is usually not fine like Angora or Merino. The benefit of long wool is that it’s very durable. In addition I used a worsted spinning method making the yarn even stronger.

    The yarn that is so thick can be good to make socks, outer ware, or mittens. I decided to knit a pair of mittens since longevity is important. The tight twist of the thread adds to the durability even more.

    I hand-knitted this pair of mittens while having a social breakfast with my family on a weekend. I could definitely see the uneven areas of yarn and I knew where I needed to improve.

    The palm side of the mittens.
    The palm side of the mittens.
    The back of the mittens.
    The back of the mittens.

    My first project gave me an amazing sense of satisfaction seeing the shapeless and fluffy wool transforming into an article of clothing.

    Thank you for reading!

  • Handspun and Hand-knitted Hickory-dyed Lace Tunic

    How I made my Wool Lace Tunic from Start to Finish

    Making things from scratch is so rewarding! So, when I crafted my lace tunic a few years ago, I intended experience every aspect of garment making. It wasn’t truly a farm-to-fashion journey quite yet because I didn’t really see the sheep that produced the wool. In fact, the roving I purchased was an import from England.

    But, I was excited to embark on my new wool craft endeavor. To give you a sneak peak of my lace tunic project, I made the picture montage below.

    Hickory lace tunic montage
    Hickory lace tunic montage

    Starting my Lace Tunic Project

    My project began with a trip to the local yarn store for a quick purchase of some fleece for the spinners guild meeting. I bought a pound of off-white roving consisting of wool from 57 different sheep. With that roving and my travel spinning wheel, I rushed to my guild meeting.

    Wool roving for my lace tunic.
    Wool roving for my lace tunic.

    Gosh, I can’t tell you how much I enjoyed my spinner’s guild back in Kentucky! I made so many friends and learned a lot. Ah, I really miss my Kentucky guild!

    I arrived to the meeting and set up my Lendrum portable spinning wheel. All yarn spinners bring their wheels and arrange them in a large circle. That way, we can all see what other crafters are working on, share tips and ideas, joke and socialize while having refreshments. I hope, you guys are back to your gatherings after the pandemic.

    Spinning the Wool into Yarn

    So, having everything setup, I decided to spin very fine yarn for my lightweight gossamer pullover for that exceptionally warm winter month.

    Wool roving and the lace-weight yarn.
    Wool roving and the lace-weight yarn.

    After the meeting, I finished the rest of my project at home in a few days. It was surprising to me to learn how long it took to spin just one bobbin when the yarn is so fine!

    When spinning yarn, the general recommendation is to keep it on the bobbin for 24 hours to let it rest and set in the twist. I as a diligent spinning student, I followed this recommendation and waited impatiently until the next day. My spinning instructor would be so proud!

    The next step after spinning is plying. To ply the yarn, you need to spin two or more fibers in the opposite direction. This way, the yarns literally wind on each other. The opposite spin allows to slightly loosen the torque by unwinding the yarn. I made a two-ply yarn to make sure it is still very fine for my gossamer tunic.

    The Niddy Knoddy Winding and Singing

    Following my usual routine, I transferred the spun and two-plied yarn from the bobbins into skeins using a hand reel with a bucolic name “niddy noddy”. (Some people call it knitty knotty, but it’s actually niddy-noddy). Back in old days, women and children used to sing the niddy noddy song while winding their yarns into hanks.

    Here is my hand-spun yarn on a niddy noddy.
    Here is my hand-spun yarn on a niddy noddy.

    The Yarn Makeover

    The next steps in yarn preparation for knitting are dyeing and washing. Since my yarn was almost white, I could used any color I desired. As with all other fibers I produce, I use only pigments derived from nature. This time, I found the natural dyes right here in my back yard.

    The carpet of fallen autumn leaves transformed the forested countryside into a cinnamon-colored landscape. The bright patches of terrain found under the hickory trees are especially attractive.

    We collected a few pounds of dry hickory leaves for me to dye my yarn. Dying with natural pigments has an element of surprise as one never knows what exact color, tone, or shade to expect. I could hardly wait to see the final color. To my great surprise, the result exceeded my expectations. I was very happy with this rich golden-brown hue.

    Hanks of wool yarn dyed with autumn hickory leaves.
    Hanks of wool yarn dyed with autumn hickory leaves.

    I am finally ready to wind my washed and dyed yarn for knitting. Whew!

    My Lace Tunic will be One Big Swatch of Elaborate Patterns

    I have a large collection of intricate and intriguing lace knitting patterns. The patterns by themselves are very elaborate and pretty. I decided to go even further and combine some patterns into a three-dimensional garment. My elaborate lacy needlework required a little bit of calculations, but it wasn’t too bad at all.

    My lace tunic project was kind of an experiment combining gossamer patterns. Two things I knew for sure. first of all, I wanted a round yoke and three-quarter sleeves. Everything else was pretty much a free form.

    After making a small stockinette swatch to measure the knit gauge and a little counting, I made my “Hickory Gossamer Tunic”. Because of not knowing the final result and going with the flow so to speak, the making process became very gratifying to me.

    Quite often when knitters finish their work, they stop there. However, there is one more step to do to make your garment looking neat and professional. This step is called blocking. The blocking can be done in many different ways. Perhaps, I’ll write an entire post just on that. So, let’s see how I blocked my lace garment this time.

    Blocking my Handmade Lace Tunic

    Before the Block

    As you can see from two pictures below, the lacy pattern makes the newly created knit fabric look very corrugated.

    Lace yoke has a lot of texture.
    Lace yoke has a lot of texture.

    The pattern that I selected for the bodice has even more relief. In fact, the shape looked to me like an egg carton while in the making.

    Lace pattern is corrugated in its original form. It needs blocking.
    Lace pattern is corrugated in its original form. It needs blocking.

    Obviously, some knitted projects have a purpose of being scrunched like this. It all depends. But I wanted my tunic to be more flat. For this project, I decided to wet-block followed by a steam-block.

    Soaking the Garment in Water

    For wet blocking, I completely immersed the tunic in water. When it was fully saturated, I pulled it out and squeezed most of the water very gently and trying to avoid any wringing. Then, I laid the tunic onto a thick towel and rolled it in like a burrito. An additional squeezing of the towel burrito moved a large portion of the water from the garment into the towel.

    Spreading and Pinning the Tunic on the Blocking Table

    After this process, the tunic stayed pretty wet, but not dripping. I placed my tunic onto a special blocking table. The markings on the table surface help spread out the garment as symmetrically before setting it in a permanent shape.

    Blocking lace tunic.
    Blocking lace tunic.

    The tunic in the picture isn’t just lying on the table. I use special pins and wires to shape the neckline, the sleeves, the sides, and the “teeth” of the hem. This is quite an elaborate process, but it’s done only once. You don’t need to pin and block your knit wool garment after each wash.

    Steaming and Ironing the Wet Tunic to Set the Texture

    The final step in blocking is to fix this shape to make it permanent. I used the iron that I floated at about half-an-inch from the pullover. This this distance from the iron plate provides enough heat to set the fibers in the pattern without pressing them leaving some texture, but making the garment more manageable during wear.

    When the tunic eventually dried on the blocking table, I still wanted it a little more flat. This time, I simply steamed it with the steam iron without touching it. You can touch your garment with hot iron. But this will block it into a very flat garment permanently. This type of blocking is called “killing”. Killing can give you very nice result if desired.

    The Result

    My lace tunic turned out to be very nice, lightweight, and comfortable. I like the shape, pattern, color, and overall design.

    My finished lace tunic.
    My finished lace tunic.
  • Assembling Sari Silk Pillow: Part II

    After finishing the first part of the project, I took a little break. Finally, I returned to my sari silk pillow and finished it. When I started my project, I intended to make two pillows with the sari silk top on one side and cotton fabric on the back. In this process, I couldn’t find cotton fabric in my stash that would be a perfect match. I did not want to go shopping because of the COVID-19 pandemic. So, I ended up combining the two woven tops and constructing one pillow.

    To make it more visually interesting and versatile, I changed the order of colors in my second pillow top. The first part has orange on the outside and green inside. The second part is just the opposite, with green on the outside and orange strips in between the green ones.

    Both sides are so pretty! I cannot make up my mind about which side I like better.

    The second woven pillow top hot off the loom
    The second woven pillow top hot off the loom

    The next step was to use the same silky liner and embellish my sham with cotton lace. The result was just as adorable as the first half of the project.

    The irregularities in the fabric grain render the handiwork a more authentic look.
    The irregularities in the fabric grain render the handiwork a more authentic look.

    After finishing the liner and embellishments, I reinforced the fabric edges with a so-called sewn-out zig-zag stitch. It was not absolutely necessary, but I wanted to add some extra durability.

    Finally, the two pieces were combined to complete the pillow case with a small opening on one side.

    Finished pillowcase with a small opening on the right for stuffing.
    Finished pillowcase with a small opening on the right for stuffing.
    The pillowcase on each side.
    The pillowcase on each side.

    The fluffy stuffing was distributed with care to make sure that every corner has an equal amount of stuffing and that the pillow looks and feels very smooth and even. And here it is, stuffed and smiling at you like a happy seal basking on a beach.

    Stuffed pillow ready to be sealed.
    Stuffed pillow ready to be sealed.

    The parts of the opening were hand-stitched together. The pillow is finished.

    Sari silk and cotton decorative pillow collage
    Sari silk and cotton decorative pillow collage

    I hope you enjoyed reading about my project and looking at the pictures.

filigree ornament
0
    Your Basket
    Your basket is emptyReturn to Shop