Homemade 1-2-3 Lotion is Gentle and Nourishing, Easy to Make, and Loved by the Entire Family
Do you use lotion on your face, hands, or body? I rely on hand lotion several times a day. Every time my hands come in contact with soap and water, I reach for it. And that’s often! Between working on my hobby farm, gardening, playing with my pets, washing wool fleeces, and handling all sorts of materials, my hands are constantly exposed. This homemade 1-2-3 lotion is a real life saver!
Working with wool, in particular, can be tough on the skin since wool naturally absorbs oils. As I work with it daily, my hands need extra care. So, lotion is a must for me.
If I expose myself to commercial lotions and cremes in such amounts every day, I would be absorbing so many carcinogens, irritants, endocrine disruptors, toxicants, allergens, etc. Additionally, all this chemistry washed down the drain would eventually accumulate enough to disturb the ecosystem.
As Easy as 1-2-3
So, my approach to skin care is very straightforward. My lotion must have moisturizing and emollient properties, and must be slightly acidic. Such modest requirement can be achieved with three simple ingredients. Water (moisturizer), oil (emollient), and wax (surfactant – the agent that homogenizes oil and water). The key to this recipe is in the proportion of these ingredients. Too much oil will leave oil residue on the skin. Too much water will cause the lotion to separate and form water puddles on the surface (that part is easy to fix, just drain away the excess water).
My mnemonic for this magic formula is very simple: remember the magic of 3. The recipe consists of 3 basic ingredients. You will need 3 quarters of a cup of each main ingredient (oil and water). And you will need 30 grams (1 ounce+) of the “supporting” ingredient (scientifically called excipient) – the beeswax.
The simple Homemade 1-2-3 Lotion recipe
- 3/4 cup oil (coconut oil, olive oil, or avocado oil work very well);
- 30 grams beeswax;
- 3/4 cup water (rose water, herbal or green tea are optional).
Notes:
- You can use one oil or any combination of oils as long as the total amount is ¾ cup.
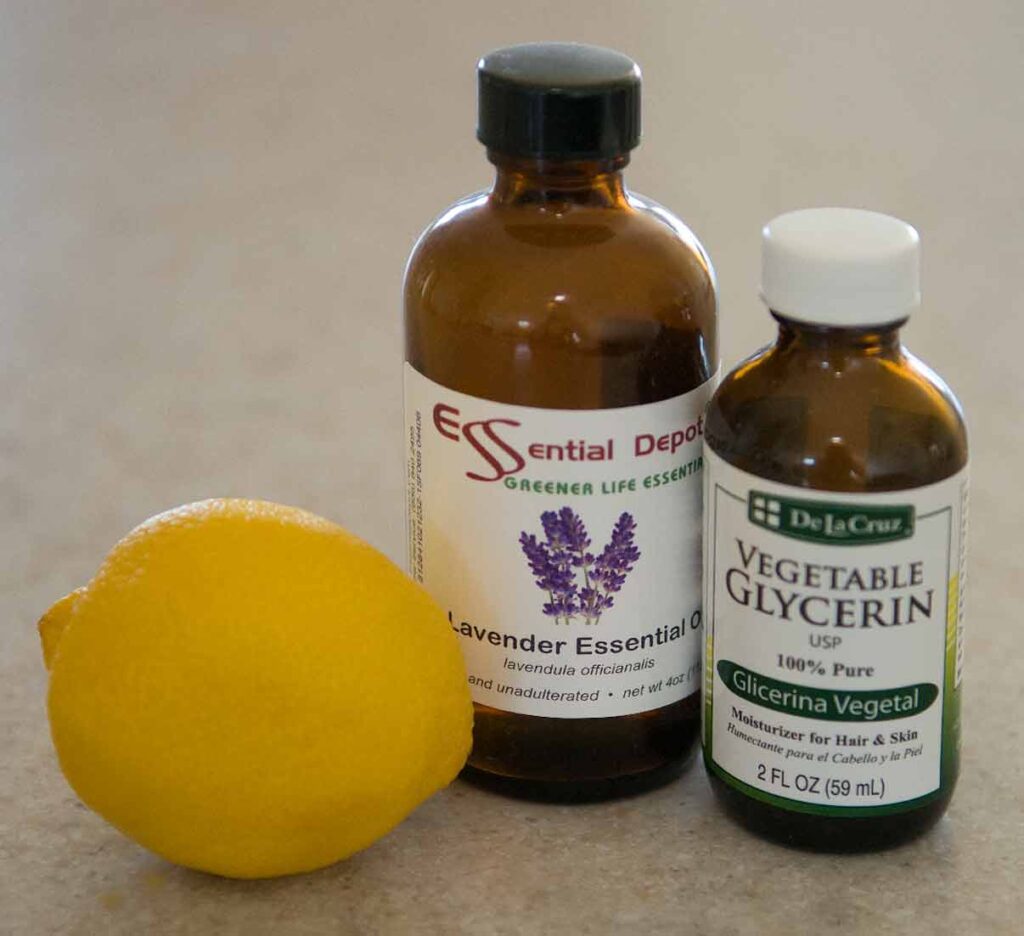
- Add 2-3 tablespoons of glycerin to enhance moisturizing quality.
- Your favorite essential oil can be added as an option. It should be added as the very last step in the making process.
- Add 2 tablespoons of nano-zinc oxide for sunscreen lotion.
- Citric acid or fresh lemon juice can be added to the mixture to lower the pH and work as a preservative. The normal pH of our skin is slightly acidic (low).
- Vitamin E can be added as a preservative.
Directions
The magic 3 likes this recipe. The process also consists of three steps: 1) weigh the ingredients; 2) melt oils and beeswax in a double boiler; and 3) homogenize with an immersion blender. That’s it. Let’s make 1-2-3 Lotion.
Step 1
Weigh beeswax and place it into a vessel for double boiler. The mild honey fragrance of beeswax will give your lotion a hint of honey smell. Yam!

If you use coconut oil, it helps to pre-melt it on a low power in the microwave. Add 3/4 cup of oil in your double boiler.

Step 2
Place the cup containing the wax and oil into a double boiler and keep until all wax is melted.

Keep in the double boiler until the beeswax is completely melted.

If you look at the mixture from the side, you’ll see that the layers are still separated.
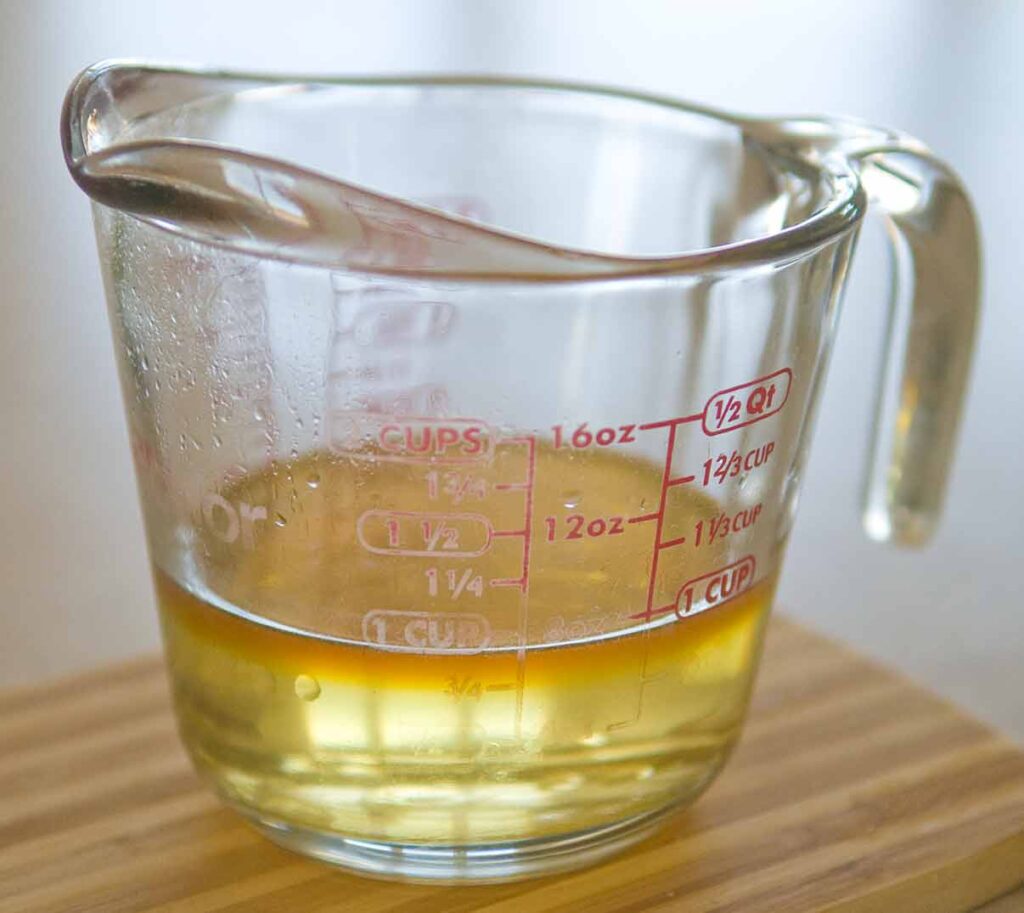
In the next step, add 3/4 cup of boiling water into the mixing cup.

Some people boil a separate pot of water for this purpose. I simply dip three quoter measuring cups into the water used in the double boiler. My double boiler war perfectly clean to begin with. The mixing cup was clean inside and out. The water is perfectly fine for the lotion. Besides, it has been boiling for a long time — it does not have anything living in it.
Step 3
The final step in making 1-2-3 Lotion is to blend the mixture with the immersion blender.
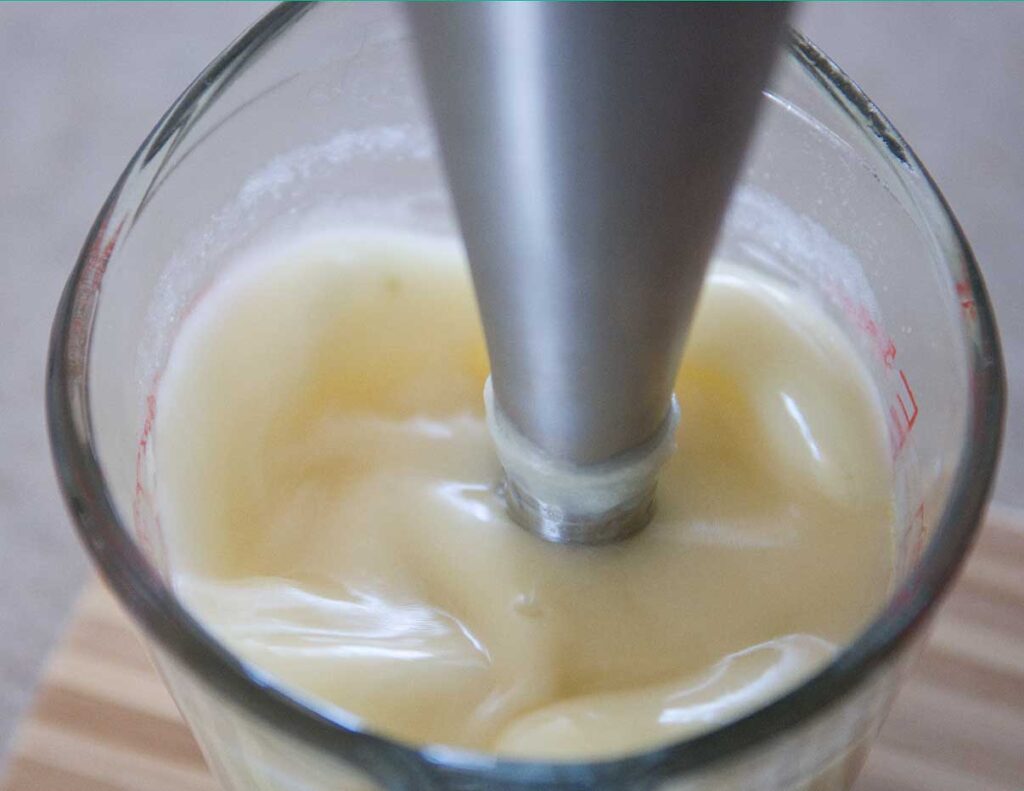
When using the immersion blender, make sure the mixture is not too hot to avoid burns.
Move the blender up and down to introduce some air into the mixture. It’s ok to pull the blender all the way out and let the air get trapped in the dome. Keep in mind that for the beeswax (surfactant) to work and homogenize the oil and water mixture, it needs air bubbles.
Blend for 3 minutes at a time and let the mixture rest and cool for about 15 minutes. Come back to it every 15 minutes and blend for 3 minutes at a time. You will start noticing that the mixture is becoming more and more white. It may never be completely white if you are using dark oils like olive oil, for instance.
Continue in this fashion until the lotion reaches room temperature and looks completely homogenized.

At this time, you can add other ingredients as described in the Notes above. It is not very important when in the making process you introduce any of your additives listed in the Notes. But it is imperative that your essential oil be added at a lower temperature. Otherwise, the fragrance of the oil can evaporate, and the lotion will not have your favorite fragrance.
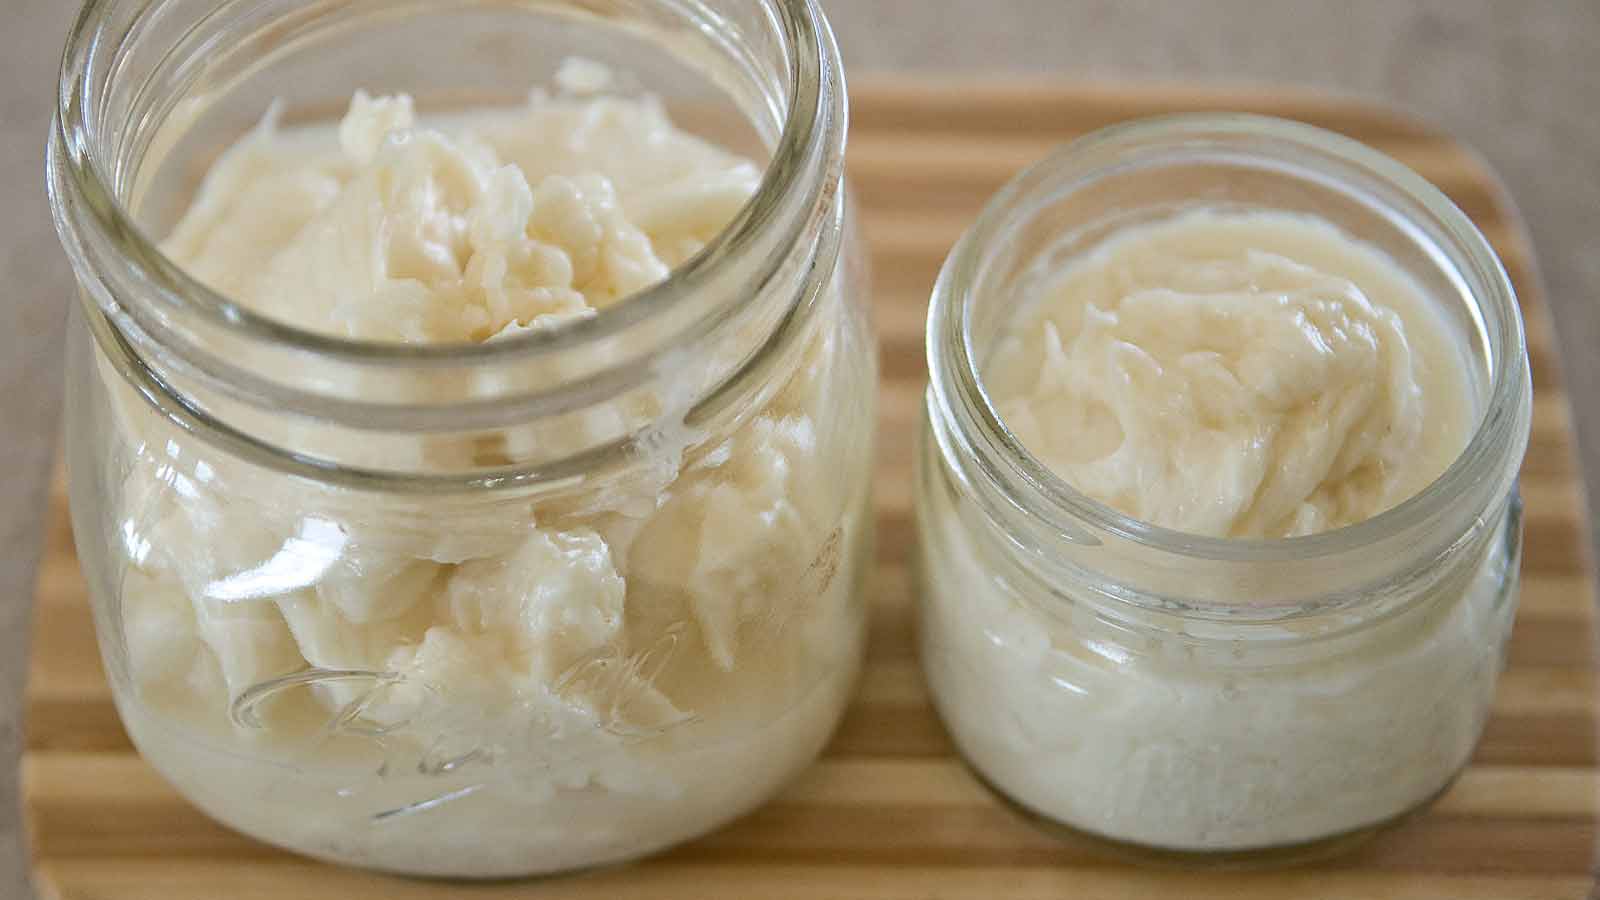
That’s it, your 1-2-3 Lotion is ready to go into jars. Keep it in the refrigerator for longer storage. Make sure your kids don’t get a hold of it. It looks like a desert and, sometimes, it smells like one.

Sometimes, I place a large jar of lotion in the fridge (my stash :)) and a small jar on my nightstand or vanity for use.
If your homemade 1-2-3 lotion is used and kept at a room temperature it should not separate. But separation may happen if you keep it in a console of your car in the heat, for example. Simply reheat your separated lotion and re-mix with the immersion blender. The cooler the temperature, the less likely for your lotion to separate.
Try it. It’s as simple as 1-2-3 and very good for your skin.
Stay safe and healthy,
Kimberly
